If there is one thing advanced-level surfers won’t admit to you, they wouldn’t want to teach you how they do it. Experienced surfers may be off, silent, and awkward when you begin to ask questions. They may come off as arrogant and self-absorbed.
But it is for a good reason.
Surfers started as beginners, too. They experienced not being able to control the waves they faced. Despite the vastness of the ocean, it gave them limited resources – or, to put it merely, waves to learn how to ride. These waves, however, came in different shapes and sizes.
This reality is what surfers want you to figure out for yourself. Every wave comes differently. A specific style confronts particular types of waves. One that will make you look and feel good while staying safe.
Learning how to surf, as with most sports, is not easy. Some who have tried have gone bored because of the slow learning curve. But, others stay because that’s the most exciting part – challenging oneself to improve in every ride.
Table of Contents
What is Surfing?
Surfing is next to swimming and diving as the most popular water sport. It is the act of riding on the waves. People who surf are called surfers. Customarily, surfer surf by lying, kneeling, or standing up on the surfboard. Over time, it evolved to body surfing and windsurfing, too.
In surfing, the wave rider rests on the forward part of a surfboard, facing a moving wave that typically brings the surfer toward the shore. Although oceans have more suitable waves for surfing, riders made it possible to ride even in lakes or rivers.
This sport started as an essential activity in Polynesian culture. It goes back to the 4th century AD when Polynesians made their way to the Hawaiian Islands from Tahiti and the Marquesas Islands. These folks brought with them their colorful customs. One of which is playing on waves using their Paipo boards.
Surf riding is also linked to riding waves on planks and single canoe hulls. Historians also believe in its connection to fishing. The ancient Peru culture surfed on reed watercraft fishing.
Surfing was introduced to the Western world when three teenage Hawaiian princes took a break from their boarding school in 1885. They brought to their trip to Santa Cruz, California, their custom-shaped redwood boards, and rode the mouth of the San Lorenzo River.
George Freeth, an American lifeguard and swimming instructor, was the credited “Father of Modern Surfing.” He and a colleague, Hawaiian surfer Duke Kahanamoku introduced surfing to the United States.
Surfing is more than just a sport nowadays. It is now a culture that waves represent diversely. Some riders surf as a recreational activity, while others make it the center of their lives. It is most dominant in the US and Hawaii; however, its popularity is slowly getting known in other parts of the world.
Beginners Guide to Ride The Waves
Surfing is not an easy watersport to learn. Learning to ride the waves could take weeks or sometimes even months, depending on your skill, fitness, the conditions of the waves you ride, and the frequency of your practice sessions.
Back when surfing was not as big as it is now, there weren’t any surfing schools that you can turn to ask to teach you how to surf. Surfers then relied on watching experienced riders do their thing and then trying it on their own.
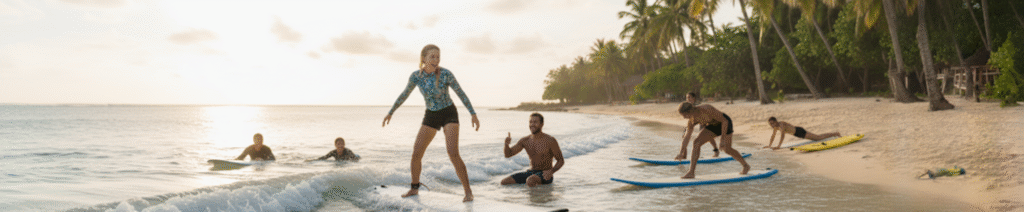
Now, every surfing community has a surfing school. It is a happy sight to see kids, teenagers, and young adults trying to learn. It is impressive to see them ride waves. Surfing schools are a great help in boosting the popularity of this watersport and improving your surfing skills at the same time.
However, if you want to learn how to surf through the good old “learning by yourself,” here are a few tips you can take note of and memorize by heart.
Step 1. Condition and Prepare Your Body for Your Training
Like most sports, you should prepare your body to endure the physical exhaustion of multiple training sessions. You will need more than just strong legs, but right arms’ strength, powerful shoulders, and a tough back.
Why? Simple. You will be spending 99% of your time paddling through the waters with your surfboard in a prone position. You will be drained after one to two hours of paddling, and you might wake up the next day with a very sore upper body.
Prepare yourself for training with physical activities like push-ups, pull-ups, and some dips. A little cardio such as running or jumping rope will help, too. Train yourself to balance with a surf skate or a balance board.
Step 2. Try It Out First With Bodysurfing
We mentioned in step one how that paddling would eat the majority of your learning time. Therefore, beginners usually have their surfboards under their arms. This practice is so that they master the art of paddling. Beginners typically give up at this point, as they feel frustrated that they aren’t doing anything but paddle.
 In reality, paddling is the essential knowledge you need to arm yourself with. When you’ve mastered paddling, the natural sequence is bodysurfing. Riding the waves with your body allows you to feel and understand the waves as they crash into your board or vice versa.
All you need to do is to get into the water with your swimmers. Try to catch some tiny waves and let them push you back to the shore with your body in full extension. It adds fun to the learning part, and it leaves you with a deep feel for the wave, allowing you to learn when you should push into it.
Once inside the swell and grasped its energy and momentum, it will give you the sense of learning how to steer and maintain speed. Body surfing is like body dragging in kite surfing. It is a crucial step that is an absolute prerequisite for anyone who wants to ride a surfboard.
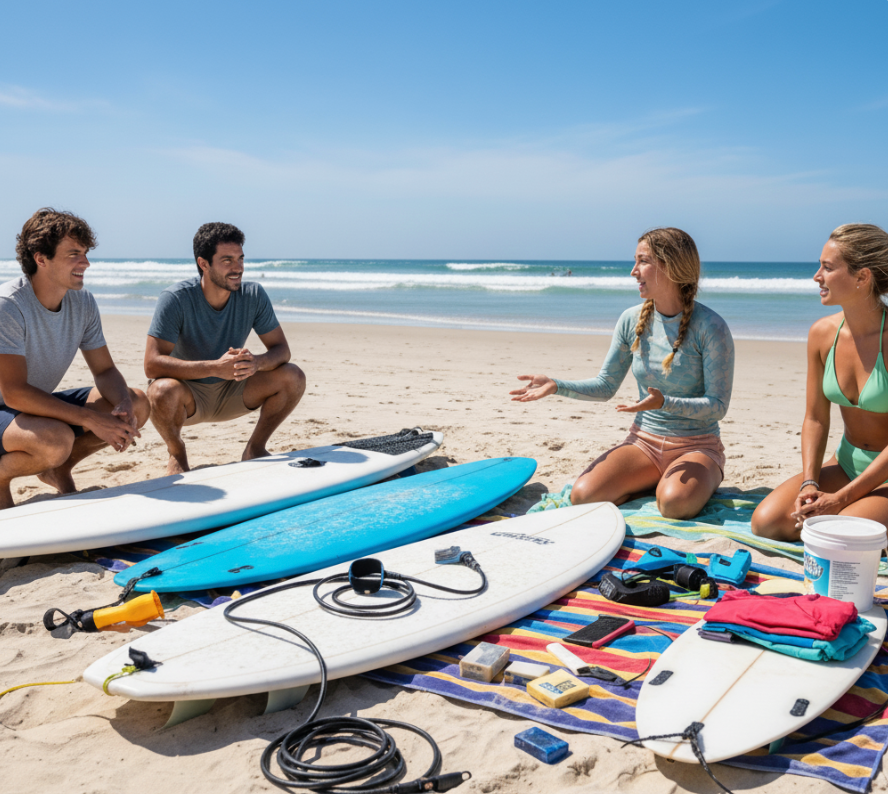
Step 3. Know What Surfboard to Ride and Gears to Use
Do not immediately jump on a surfboard just because the famous surfer uses it. The experienced surfers exerted their time and effort to level up and ride whatever board they are r
iding. It would help if you began with a big board.
You may be tempte
d to go for expensive shortboards that come too short for volume and dimensions to help a beginner catch waves. A 10-ft soft-top longboard will help with mastering paddling skills because they are stable to ride.
Longboards give you enough chances to read the ocean and learn how to pop with ease. Soft tops are good at keeping you from getting bruised, especially when the board hits you in the waves. Longboards also float you well enough when you are lying on top of it, allowing ease in paddling.
Surf spots usually have rentals for surfboards. You may want to try out different surfboards from these rentals so you can feel each type while you decide which one is better for you. It is not advisable at this point to acquire a new one. You may consider getting second-hand surfboards, instead.
You may also consider getting a leash or leg rop
e, that is, if they haven’t come together with the soft top you just bought. Some efficient leg ropes are Santa Barbara Surfing SBS 9ft Surf Leash for Longboard or Ho Stevie! Premium Surf Leash. Consider the thickness and length of the leash. Beginners can go with a measurement that will keep the surfboard from getting pushed back to the shore during whitewater.
Another gear that you may find necessary is a wetsuit. This apparel doesn’t just make you look good but will keep you warm on low-temperature waters. On warm days, you may prefer to wear a rash guard or neoprene top to keep yourself from getting sunburnt or rashes from too much contact with the surfboard.
You may check out Hevto Wetsuits Men and Women Guardian or O’Neill Men’s Basic Skins UPF 50+ Short Sleeve Rash Guard.
Step 4. Find the Perfect Learning Spot
As a beginner, perfectly peeling waves aren’t ideal for you to ride yet. They are unforgiving. Keep your eyes on those long rows of knee-high whitewater that roll toward the shore. That spot where the kids are learning is your best point.
But, be sure it isn’t too crowded. You wouldn’t want to hit anyone when you stumble and fall. You will need enough space for yourself to catch waves and ace the art of paddling into waves and popping up from your board.
Your search for the right spot shouldn’t just depend on the information about it. Instead, it should include the forecasts for its daily wave condition. Take time to research the surf spot you found. If you can’t decide which location to pick, go to a lovely swimming beach. Their safety requirements for paddling are almost the same as swimming.
Step 5. Prepare Your Gear
The first thing you need to set up as soon as you hit the beach is the leash on your surfboard. Note that the string that comes with the leash must go through your surfboard’s leash plug, then to the through-the-board side loop of the leash.
You need to make sure your body is protected against the water temperature. Cold waters mean you need a wetsuit. Warm needs you to be on a rash guard. Don’t forget to put on the right amount of sunscreen since the sun is twice as harmful in water because of its reflection.
Having said that, a good pair of surf sunglasses is something you may need to protect your eyes from too much glare.
Remember the valuables you need to keep from water, like car keys, wallets, or phones. Create an effective system that will hold them safe while you surf. Do not attempt to leave your car keys behind the wheel. There have been quite a lot of stories told about getting their stuff and car stolen.
An option is to get your car key duplicated. This key is what you can put in the key pocket of your wetsuit or your leash while your original car keys and other personal belongings stay hidden inside your car.
You may consider not putting anything in plain sight like board bags and towels. Do not leave an idea that yours is a surfer’s car.
Step 6. Stretch and Warm-up
By this point, your excitement to hit the waves may be elevated. But, don’t let this excitement keep you from ignoring the importance of this step. Stretching and warming up prepares your body for the challenging workout you will get from a couple of hours of a surf session.
Remember that you will spend the whole session straining your core muscles, arms, back, and shoulders attempting to stay on your board and paddle. When combined, all these give you some effective cardio workouts.
You may start with an easy run and a few jumping jacks to keep your blood pumping. Follow up with a few crouches and standing lunges to loosen up legs, knees, and lower back.
As a beginner, you might throw your arms around too much as you try to rotate your upper body left and right, bend down, and back up. These movements could get your muscles strained in the end. Don’t regret and understand the importance of warming up a day after your session. Warm up before and after your ride!
Step 7. Pop Slowly but Surely On Your Board
After stretching and warming up, your next goal is to be able to pop up on your surfboard once out on the waters. Practice, as they say, makes perfect. Do it by drawing your board’s shape on the sand, lying down inside the form you drew, and getting up by pushing off with your hands sans your knees touching the sand.
In your first few tries, you may find yourself in some strange stance with your feet very close or far apart from one another. The secret is to keep trying until you land directly in the proper posture – like a comfortable pose on a surf or skateboard.
Obviously, popping on sand is way easier than on a surfboard in the water that’s less stable. This simulation is good practice and can help you a lot once you are on the swells.
Step 8. Paddle. Paddle. Paddle.
Once you’ve warmed up and are now armed with the ability to pop up, the next step is to get in the water. At this point, you need to learn how to paddle with your hands. Do this practice on the water, unlike Step 7.
First, you need to lie down, stomach against your surfboard, and paddle with your hands. Keep yourself in a prone position on moving waters with small waves. Doing so lets you learn how to balance.
Aim to keep your feet close together as you take alternate strokes with each hand. Try not to stretch your arms too far out, and don’t pull your hand too far back, either. They should be at no further than eye level and no further than hip level.
Master your paddling across small waves. Attempt to lift your head and chest faintly. Slightly push your upper body up, or compress yourself on the surfboard to allow the tide to roll over your head.
Step 9. Paddle Into Your First Wave
Run through routines of changing direction while paddling to learn how to turn 180 degrees. You can do this by taking a few strokes on the same side with your hand further away from your surfboard.
You will, as you are paddling out, spot a wave coming in your direction. Slowly begin to turn the board around and paddle as much as you can. After spinning in the direction of the wave, start paddling forcefully toward the shore. Do this when the swell is at an approximate distance of 20 feet from you.
The wave will catch up. When it does, it will lift you and tip your surfboard into the spiral, creating momentum. Be one with your surfboard and feel it glide into the wave. Stay in the prone position and pull on the left or right tail with your hands to steer it.
Go along the wave entirely until it fades out. Then, resume paddling once the momentum goes out.
Step 10. Stand Up
Learning how to stand up on the surfboard is a significant achievement for beginners. This part is where bodysurfing and practice popping up pays a lot.
Standing up on the surfboard starts just like when you try to pop up, only this time, instead of staying in a prone position, you stand on the board. Most times, beginners fall very quickly. Some surfers’ trick is to put their knees down before getting up.
Remember, squatting and getting low on the surfboard helps with stability, allowing you to stand longer.
Step 11. Turn on Your Surfboard
As soon as you can paddle into a wave, pop into a standing position on your surfboard, and ride it until the momentum loses, you should be able to turn in the tide to stay ahead of the whitewater.
To do this, you must, to some extent, shift your body weight onto the board’s edge on the side of the direction you are turning—for instance, your right rail to turn right. Do the shifting of the weight subtly since a surfboard on moving water can be very unstable.
Begin steering your surfboard in the wave’s direction the instant you pop up so that you won’t get caught in the whitewater. Then again, when in the wave’s green area, try to hang around to the whitewater no avoid losing energy and speed.
Step 12. Paddle Back to The Lineup
The ability to paddle out through large-sized waves and whitewater is one significant aspect of learning how to surf. To paddle out, the crucial skills you need to master are intense paddling and duck diving.
Duck diving is diving with your surfboard under the approaching wave. This essential maneuver allows you not to be pushed back to the shore by the wave’s power. The bigger the wave, the more critical this skill lies.
When you practice duck diving, stay as close as possible to the surfboard so that you won’t need to swim back to recover it. Be sure to paddle towards the wave when you are about 3 meters – from the wave.
Take a deep breath, use both hands to grab the rails of your surfboard, and push down by shifting your weight in the direction of the board’s top. This method lets you sink the surfboard’s nose underwater. After which, push the tail in the water with your back foot. The other foot goes up in the air to sink the board and give you balance.
Paddling and duck diving make up 50% of your surfing skills; thus, you should master them to become a good surfer. Make those arms, knees, and feet strong for this technical skill. Some push-ups on land help a great deal with this skill.
Step 13. Right of Way Rules
Be a good kind of beginner. Do not be like most new surfers who often get cursed at because of dropping in on other riders’ right of way. The general rule is – one person, one wave. The person closest to where the wave is breaking has the right of way.
Keep that in mind to avoid getting in trouble or, worst, getting banned from the spot.
You may encounter surfers near you yelling “Going left” or “Going right.” They do this to indicate the direction they are heading and to remind you of their right of way. It is bad etiquette to paddle around them so try to stay far behind them and wait for your wave.
In case you didn’t see them ahead and you already dropped in, try to pull out right away and apologize if you’ve cut the surfer’s path. There are also instances when the peak is not too clear or who started where and when. In such scenarios, other paddling surfers will decide and act as judges.
Step 14. Get the Gear You Need!
At this point, you must’ve experienced not just the waves and the sand but the surfboards you’ve tried during your training sessions. This is when you decide what surfboard to pick.
Foam tops are one of the choices you can pick from since you will still be on the learning curve that puts you at risk of injuries and falls. This type of surfboard is stable and has high floatability. However, the same characteristics will soon get in the way of your learning progress.
Its floatability may slow you down for paddling, slow turning, and duck diving. Having said that, your must-have is a hard surfboard with a slimmer shape.
The right surfboard for a beginner is very hard to define. It will depend on your size, fitness level, and the type of waves you will want to ride. Ideally, the bigger the rider, the larger the boards. But, that could be in a lot of different things like length, width, or thickness.
To give you an idea of the best surfboards for beginners, a few minutes of research here and there won’t hurt.
Step 15. Start Generating Speed
One of the most common mistakes that beginners tend to make is to try on daring tricks and maneuvers right after learning how to paddle, take off, and pop up. They instantly go out and get themselves pro-shaped surfboards to perform off-the-lips and radical snapbacks.
But, no matter how sophisticated your board is or how much you try to perform this trick, you will keep failing if you don’t generate speed. Building up momentum is another critical skill that you need to improve in surfing.
To generate speed is to combine perfect timing and wave reading. Add to that pumping and carving motion with some leading shoulder and full-body rotation while always positioning near the curl where the wave energy comes from.
Safety Tips for Beginners
Surfing is a watersport that is not entirely the safest. The falls, bumps, twists, and turns may cause you injuries that could sway you away from wanting to learn. Here are some safety tips you may keep in mind to avoid untoward incidents on the waters.
- Do not hold your board between you and the waves.
- Always fall flat on the surface of the water like a leaf, instead of dropping straight down. The latter leaves you dropping deeper, and when you do, the chance you’ll collide with something underwater is huge.
- Protect your head when you fall, especially when you are parted from your surfboard.
- Do not reel in or hold your surfboard with your leash string.
- Hydrate, stretch, and warm up before and after every session.
- Stop immediately at the moment you experience severe back or neck pain.
Surfing Etiquette
Manners matter, and it also applies to this watersport. Although it is not written in black and white, it is a common courtesy that surfers follow to respect surfers’ co-existence, locals, and the ocean. These rules also keep you safe from risks of injury.
- Do not take off in a wave that someone else is already riding. Wait for your turn.
- When you notice a rider in front of you when you are paddling out, the safest thing to do is to paddle towards the whitewater. This step shields you from the risk of another board hitting you.
- Do not snake. This act is practically wave stealing. It means paddling up to another surfer and taking their position.
- When out in the water, check out your surroundings. Be mindful if someone is in front of you or behind you.
- When walking towards the water with your board, hold it on your side, not in front of you. You would not want the force of the water to push the board and slam it on your face.
- Do not surf immediately after a meal: wait at least half an hour.
- Help any surfers you see who are in danger.
- Respect nature and the locals.
Conclusion
Surfing is not just a sport but a culture and a lifestyle. It is almost the same as having the commitment to keep healthy habits and exercising since it is undeniably a high-endurance sport.
Surfing challenges you and pushes you to the extreme. To be successful in this area, make sure to have an excellent mental and physical balance, respect for other people, and patience. You will fall and stumble too often that you mustn’t be too hard on yourself.
FAQs (Frequently Asked Questions)
Q: Is skateboarding close to surfing?
A: Skateboarding helps with stance, balance, and turns but not pop-ups, but it is one simulation close to surfing.
Q: What time should I surf?
A: It depends on where you are surfing. There are places, particularly on the East Coast, where the waves are great all day and clean up by the time the sun sets. Some California spots have glassy waves early in the morning that get choppy and unsurfable when the wind picks up.
Related Resources
- Best Wetsuit Brands
- Surfboard Travel Bags
- Longboard Surfboards
- Fish Surfboards
- Mini Mal Surfboards
- Foam Surfboards
- Shortboards
- How Long Does It Take to Make a Surfboard?
- What Causes a Surfboard to Turn Yellow?