Top 5 Best Kitesurfing Schools in The World

best kitesurfing schools

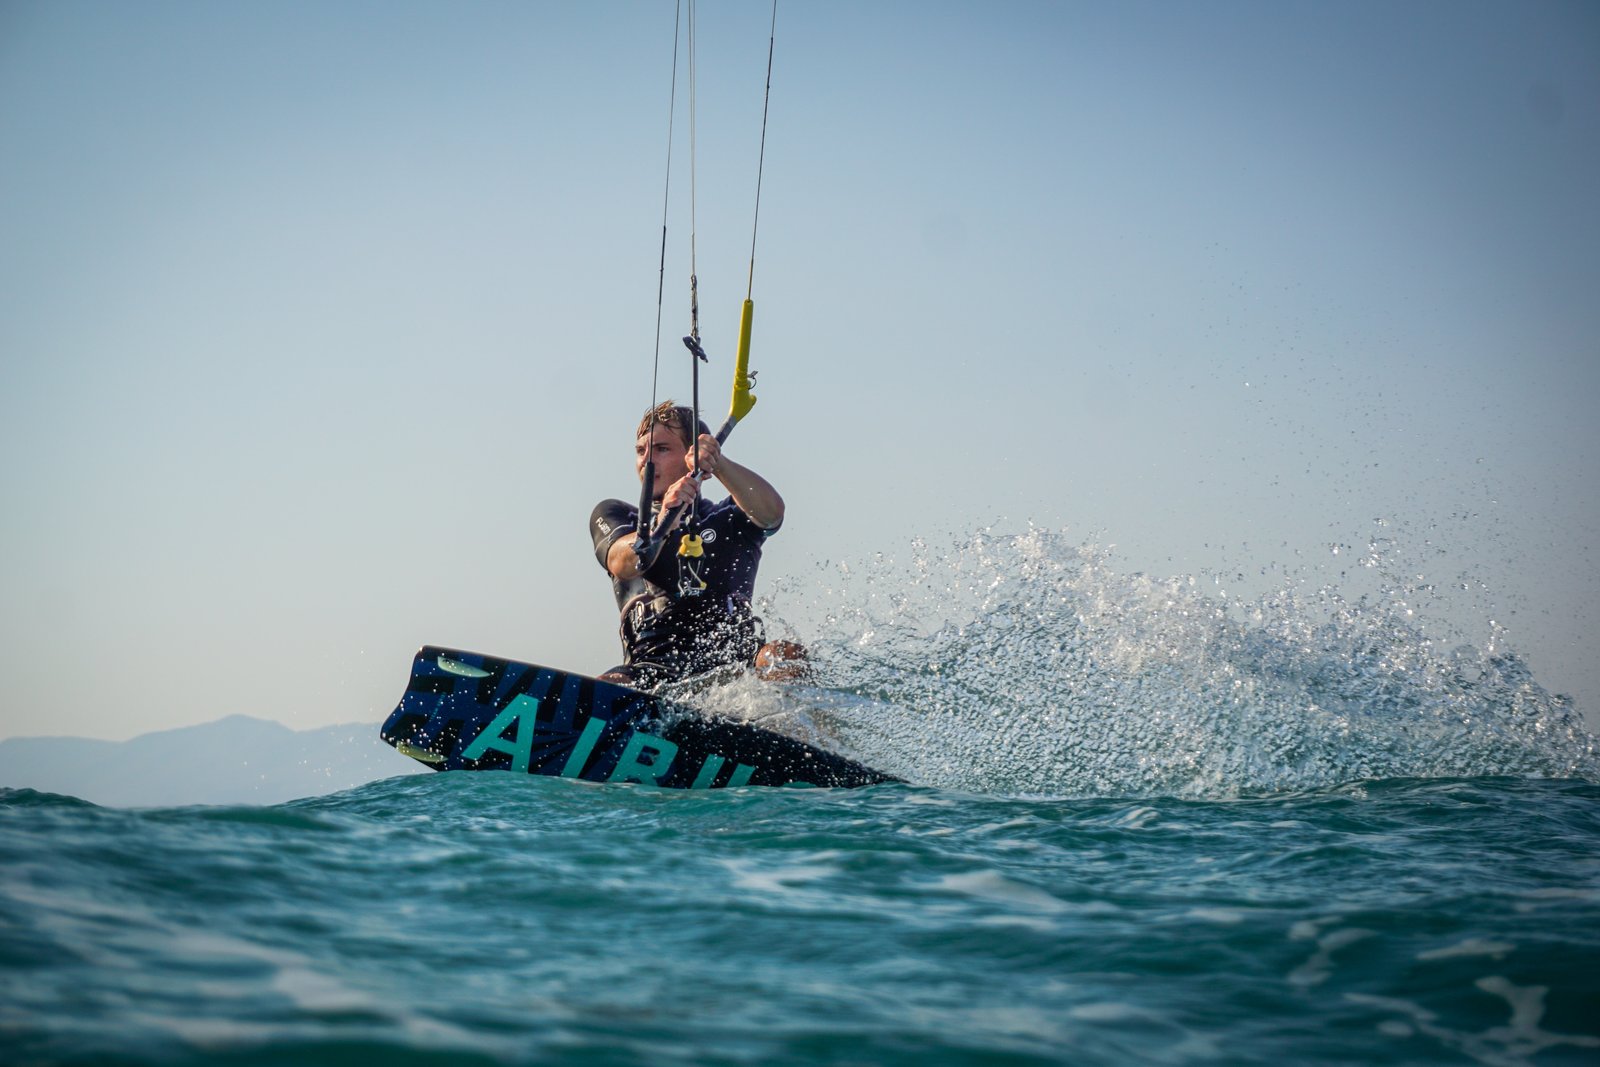
Kitesurfing isn’t as simple as it seems. It can be perilous. So dangerous that the first rule of kitesurfing is never to try to learn how to fly a kite by yourself. More especially if there is no one with you in case anything goes wrong. What you can do by yourself in learning how to kitesurf is to become familiar with power kites. Traction kites, for one, can help you understand how wind and kites work in partnership to generate speed. Kitesurfing schools are still the best place to learn to kite and get better technically. So, while understanding how power kites work, research kitesurfing camps that can help you learn and hone your skills. This article listed down five of the best kitesurfing schools and what to expect in a kitesurfing school. What Is A Kitesurfing School? As the name suggests, kitesurfing schools are establishments that offer lessons for kitesurfing. Most of the time, these schools offer packages that cover your kitesurfing lessons as well as your accommodation and equipment use. Kitesurfing schools differ from one another. Some of them go further and offer additional inclusions like meals, non-kiting activities, and transport. Others do not have accommodation on-site, and you will find it on your own. But, even if they don’t offer somewhere to stay, they can assist you in finding one. These establishments are primarily about learning how to kitesurf. Your days will be spent on the waters under the guidance of a coach or an instructor. It is far different from kitesurfing holidays, usually leaning towards intermediate and advanced kiters looking for a new place to kitesurf. Best Kitesurfing Schools There are numerous kitesurfing schools worldwide, but not many may offer the accommodations and services you need. We narrowed down five of the exceptional and far-out kitesurfing schools that you may want to consider to learn how to kitesurf. SoCal Kitesurfing (Long Beach, California) School Specifications: Beach: Kite Beach Belmont Shore, CA Wind: 15-20 mph Season: 12 mos (Best months are March to October) Certification: IKO Kite Center Activities: Beginner and advanced lessons Rental gears and wetsuits 2-way radio instruction Downwinders Supervised rentals Hydrofoil lessons and rentals Amenities: Lifeguards boat rescue Free street parking and paid lot Public restrooms Outdoor showers Nearby restaurants The Kite Beach in Belmont Shore, California, is the best place for SoCal Kitesurfing to instruct kitesurfing students. It is the only safe and legal beach in LA and the Orange Counties due to the break wall that blocks the waves. This makes learning fast and safer. SoCal Kitesurfing doesn’t only teach you how to kitesurf. It also educates you about finding the right gear, providing ongoing support tips, and introductions to a community where you can get help, tips, and tricks until you become a confident rider on your own. They offer beginner to advanced lessons, and they consider your comfort level so you can move fast or slow. They take pride in being the only kitesurfing school in California where the instructor joins the student in the water, giving help when needed the most. Signing up to SoCal Kitesurfing includes lesson packages, an IKO Certification card (with worldwide validity), your choice of SoCal Kitesurfing cap or shirt, and a photo of your lesson. All of their lesson packages are facilitated by experienced and certified staff with consistent and proven teaching methods. VKC Kite School IKO Center (Viale Al Lago, Italy) School Specifications: Beach: Lake Santa Croce, North-East Italy Wind: 12-18 mph Season: All year round Certification: IKO Kite Center and UISP Activities: Beginner and advanced lessons (kitesurf, wingsurf, SUP) Rental gears and wetsuits Body-drag Supervised rentals Amenities: Bed and breakfast Restaurants Bars Tennis courts Playground Well-kept beach Tower and lifeguards The primary location of the VKC Kite School is the Lake of Santa Croce. This lake is what the team believes to be the ideal place to start kitesurfing. But, they also have other beaches where they offer courses, including Sottomarina, Boschettona, Levante Beach, and Jesolo. Their staff and highly qualified instructors evaluate you on the spot and determine which course you should be in according to your knowledge of the sport. All of their classes – Start Course, Basic Kitesurf, Advanced Kitesurf, and Independent Kitesurf come with complete equipment and kiter assistance. Bed and breakfast are part of the school’s amenities. If you decide to make these accommodations, you will also experience daily and nightly events held at the beach. These events attract many tourists from all over Italy and neighboring areas. The VKC Kite School is IKO Kite School and UISP certified. After the course, you will be issued an official IKO patent and VKC Shirt. One that can show off the course you took with top-quality equipment for safety and maximized kitesurfing education. Adventure Sports (Noosa, Australia) School Specifications: Beach: Lake Lake Weyba, Noosa Wind: 12-18 mph Season: 10 months from October to July Certification: IKO Certified Training Centre (Level 3) Activities: Beginner and advanced lessons (kitesurf, wingsurf, SUP) Short private kitesurfing lessons Group kitesurfing lessons Rental gears and wetsuits Body-drag Supervised rentals Amenities: Accommodation Restaurants Well-kept beach Headzone radio coaching Tower and lifeguards Adventure Sports believe that kitesurfing is one exciting activity that one should experience at least once in their life. Therefore, it became their mission to make new kitesurfers, and they do that by focusing on teaching each individual what they need to know to get out there in their own way. Their team allows learners to enjoy the sport of kitesurfing by providing only the very best instructors, equipment, and beautiful and accommodating locations to maximize progression, safety, and fun. What’s more, is that they are the only council-approved and permitted kitesurfing school in Noosa. This kitesurfing school’s most popular kitesurfing lesson offers hours of private 1-on-1 instruction using radio coaching helmets. The experienced instructors let you out on the water with the latest gears to guarantee you are confident and competent with all the skills you need. All Adventure Sports kitesurfing lesson … Read more

What Is Pearling and How To Avoid It

pearling

If there is anything that ruins a great wave, it is when you waited, you paddled, and you stood as you caught the wave but tumbled over your board not more than two seconds after. It is when instead of kissing the wind and the mist from the winds, you’re face to face with saltwater. Pearling happens to everyone. They are a pretty common phenomenon for anyone learning how to surf. Pearling also happens to professional surfers from time to time. What is pearling, you ask. Can you avoid it? Find out everything you need to know about pearling and how you can prevent this wipeout from ruining your ride. What Is Pearling? Pearling is one of the most common types of a wipeout in surfing. It happens quite often to people who are learning how to surf. It occurs when the riders make it to the lineup but are not yet ready for a standup wave. It can be a frustrating part of a learner’s journey. After all, it takes a significant amount of effort to paddle and make it to the lineup. Yet, it is there to remind you that you’ve still got a bit to go before you stand up and surf. Pearling or nosedive happens when the front of your surfboard – the nose, dips into the water when you are trying to catch a wave. It results in getting the nose of your surfboard digging into the water and its back launched up. Then, you get launched off your board, smacking the waters and having the wave crash right on top of you. Why Is It Called Pearling? The wipeout’s name takes after the near-ancient art of pearl diving called pearling. It is a dangerous technique that involves pear hunters jumping off a ship and diving about 100 feet in a single breath. The way surfers nosedive during a wipeout is the same way the hunters look when they dive into the ocean looking for pearls. That’s why it is called pearling. How To Avoid Pearling Nosedives don’t immediately mean you’re doing something wrong in surfing. While it can be particularly embarrassing when you think you’ve got a perfect wave and end up pearling, it happens not just to you but to a good population of surfers. Most pearling happens in the early stages of learning how to surf. It can also occur when you are adapting to a new surfboard or when steep and fast waves are miscalculated. Moreover, when a surfer’s weight is too far forward, it can cause the board’s nose to dive underwater. Here are some tips you can try to avoid pearling on your next ride. Remember that as every surfer and wave is different, some suggestions may be more beneficial for some surfers and unalike circumstances. Take what resonates. Leave what doesn’t. Tip #1. Correct your body position The primary point in avoiding a nosedive is paying attention to your body position when paddling on your surfboard. It is essential to be far up on the board to catch a wave. Not too far up to the nose, but just enough to weigh the board down in the right places. You do not want to put the weight in the wrong parts of the surfboard, or you’ll end up going under the water and propelling yourself into pearling. The thing about positioning your weight is true to an extent, but it is only an essential starting point guideline. On smaller wave days, you will need to be as far forward on the board as possible so you can catch anything. Once you catch it and you feel like you’re going to pearl, shift your weight backward. A lot of surfers do this trick and prove it works. Another method you can try instead of shifting backward is to keep your hands back in a cobra position. This posture distributes your weight on your hips. If done correctly, the place on the surfboard that needs more weight to anchor it down will help prevent the nosedive. Take note that these tips may not always work all the time. Since you are shifting your weight back, it puts on the breaks and keeps you from catching the wave at all. These approaches are best used if you really feel you are going to Pearl. Ideally, you have to keep calm and have faith in yourself. Keep paddling to keep the forward momentum. Paddling helps because as the wave peaks and gets steeper, the nose should pop back out of the wave. Tip #2. Paddle! Paddle! Paddle! Another factor that may be causing you to pearl is how you paddle. You may either be paddling too slowly or not enough. When catching a wave, you’re not technically catching it like how a baseball player tries to catch a ball. Baseball players typically run toward the ball then stop and position to let the ball come to them. In terms of the wave, you are more like hopping on the train than catching a ball. See, when you hop on a train, you need to be running as fast as the train so you can grab it and jump on it as it is moving along. With wave catching, you almost want to try to race the waves to the shore and not let them catch you. Therefore, it is crucial to paddle faster and match the speed of the wave. By paddling as fast and as efficiently as possible, you’ll go at a speed where the wave can catch you and lift you instead of stumbling on you and beating you down. Tip #3. Proper Wave Positioning Proper wave positioning is another critical factor you should not overlook. No matter how fast and efficiently you paddle, if you are too far inside, the wave might be too steep and may tumble over you and send you down. On the contrary, when you are far outside, you can catch it when it … Read more

What Is Bellyboarding? | The People’s Intriguing First Taste of Surfing

bellyboarding

They say that bellyboarding is perhaps most people’s first taste of surfing. It could just be true, considering this riding activity dates as far back as 2,000 B.C. Most historians regard it as the original form of board surfing. Bellyboarding is making a comeback as another exciting water activity to try. Pure nostalgia, you might think – from its early days in Polynesia and Hawaii where children used bellyboards as training tools to the 1937 Great Western Railway poster that showed two women in scarlet bathing suits riding a wave on wooden bellyboards. What is it about bellyboarding? And, why is it considered rescuing fun in an uptight world of aggressive surfing world? What Is Bellyboarding? Bellyboarding is a surface water sport that involves riding waves on small wooden boards. Riders take advantage of the white water to come into the beach – very dissimilar to surfers and boogie boarders that go out of their depth. This ancient recreational practice originated in Hawaii and arrived in England in the early 20th century. Since then, it has conquered the globe and never disappeared. The Bellyboard History A bellyboard is a small buoyant board, usually less than three or four feet long, used in bellyboarding. The oldest known bellyboards are sized between 4’ to 4’5” from the 18th century. They are wooden planks with a slightly elevated round nose and a flat-cut tail. There are no fins and traction pads. Also, there is no leash since the bellyboard is easier to manage and keep in hand. This pure and straightforward wave riding tool has evolved with the explosion of surfing. So much that when it spread across the world, it gained new designs and reconquered its spot in the hearts of collectors and retro surfing aficionados. In 1960, American surfers integrated stabilizing fins to their plywood bellyboards. They rode these sticks for fun at Newport Beach’s The Wedge and Oahu’s Makapu and Sandy Beach. Surf companies like Dextra and Newport Paipo attempted to launch a few foam and fiberglass models. However, the hype faded, and the good old bellyboard went belowground. Production of these boards decreased with the development of bodyboards on polystyrene boards and the art of actual surfing. In an attempt to revive this retro slide, the World Bellyboarding Championships held each year since 2002. The first session took place with 20 participants. More than 150 competitors from different countries like Australia, USA, and the British Virgin Islands participated a few years later. Quick How-To Guide for Bellyboarding The first thing you need to remember with this water activity is that – the bellyboards are not floatation devices. Proficient swimmers and surfers ride them, while beginners should be under adult supervision. Always bellyboard at lifeguarded spots, between the red and yellow flags. If you’ve ridden a boogieboard before, you’ll realize they are almost similar but not quite. Generally, bellyboards are designed to keep you afloat. The difference is, bellyboards are made from plywood which has no floatation. These boards act as a planing surface on top of the water. Step 1. Position in thigh-deep water Between the red and yellow flags at a lifeguarded beach, position yourself in thigh-deep water. This spot allows you to dig up a strong push off the bottom. To do that, push the tail of the bellyboard onto your hips while you hold it as close to the nose as possible. You may have to stick your behind out a little. You can practice at home before heading to the beach to get used to it. Step 2. Pick the right wave Experiencing a good ride relies greatly on wave selection and timing. It is critical to pick a sound and powerful-looking wave that will drive and thrust you forward with the right amount of speed. You can try to pick a wave that has only just broken but still has power left in it. Wave selection is not as simple as it seems. It has to be learned over time. This is the reason you have to practice because picking the right waves can be learned through experience. Step 3. Timing is everything Just before the wave hits you – probably about a second before it does, jump forward onto the water in front of the wave. If timed suitably, the tide will push you along, and you will be bellyboarding in no time. Timing is everything in this activity, so you must calculate and get the pacing right. Jumping on too early may leave you sinking with the wave passing over you. Too late, and you will – well, miss the wave you waited. Be patient. It can take a few attempts if you’ve never tried it before. Be sure to hold the nose of your board with your arms extended out-front of you. Your belly and chest should be positioned on the lower half of the board. Step 4. Enjoy the ride Wave riding is a lot of fun, so enjoy the ride and do the same thing repeatedly until you master it. Bellyboards Are Built To Last and Are Eco-Friendly There is a shared purpose from the wave of responsible manufacturers within the surf industry to protect the beaches from plastic pollution. One of the most famous names in the bellyboards industry – Dick Pearce, commits to promoting and continuing the culture of bellyboarding for generations to come and to keep the beaches clean. His team sources wood from sustainably-managed forests in Europe. His commitment includes making sure his boards are lovingly produced to last a lifetime, so much that you can pass your board on to the next generation. Best Bellyboards You Can Check Out The popularity of bodyboards and polystyrene surfboards somehow left bellyboards underground. You may not be able to find one on Amazon or at your local surf store. Instead, you may reach out to custom shapers and well-known bellyboard manufacturers. Surfing Green Surfing Green is a Queensland-based bellyboard-shaper that uses sustainable surfing products to protect … Read more

How to Surf a Crowded Lineup: Pro Tips and Tricks

people surfing AT THE BEACH WONDERING HOW TO SURF A CROWDED LINE UP

Gone are the days when we could rock up at our favorite surf break and be one of, if not the only person in the water. With over 20 million surfers worldwide, and a surf population growing at 12% per year, secret spots are slowly becoming less secret, and popular surf breaks are often too crowded to catch a wave. Although it is never ideal when the lineup is full of people, it is often something we need to deal with if we want to catch a ride. By remaining patient, visual, friendly, and willing to put in some extra work, a crowded day does not need to be a bust. Crowded breaks are undeniably annoying, but the following tips will help you better navigate overpopulated surf lineups and make the most out of your day. What Are the Downsides of Surfing in a Crowded Lineup? No one likes to surf in a crowded lineup, and for good reason. Once you have read the downsides of crowds in a surf lineup you will begin to understand why. High Competition Unlike snowboarding or skating where you can constantly ride your board, in the ocean, even when surf conditions are perfect, you still need to wait for a wave to break. Furthermore, in most cases, the rule goes that only one surfer should ride a wave at a time (although there are exceptions to this rule), which makes waves even rarer. Add a bunch of people to the lineup and it is easy to see how a relaxing surf can quickly turn into a fierce competition for the few available waves. Fewer Waves for Time If you are lucky enough to find yourself in a crowd that respects how a surf lineup works, you will be able to avoid the savage competition for the waves, but this comes with a disadvantage. If everyone is waiting their turn, there are five waves per set, and twenty people in the water, it is easy to see how you will be waiting a while for your ride. This can of course be an advantage of its own but is not ideal if you just paddled out for a few quick waves. People in Your Way When there are too many people in a lineup you will constantly find yourself dodging someone. Unless everyone in the water is a good surfer and follows surf etiquette to the tee, you will constantly find people paddling out through the middle of the break, throwing their boards away, or falling off waves at the peak. As you will need to maneuver around them, you will not be able to ride the wave as you wish. This can become frustrating, especially when you have waited so long for your turn. Crowds Are Dangerous Having a few people in the water makes surfing safer as there are people around if something goes wrong. When a few people become a big crowd, the opposite is true. The more surfers there are in a lineup the higher the chance you have of running into someone else. This can, in extreme cases lead to concussions<span style=”font-weight: 400;”>, lacerations, and loss of consciousness, or if you are lucky, a broken or dinged surfboard. In a large crowd, if someone was to lose consciousness it would be a lot harder to notice them missing. Tension in the Water When there are a lot of people in a lineup tensions always seem higher.  Everyone is on edge waiting to charge the next set, constantly on the lookout for other surfers, and slightly annoyed that they are not surfing as much as they wish. This, of course, is not always the case but will happen more times than not. Although some lessons can be learned from this, it does take away from the relaxing, nature-immersing experience that surfing can be. Are There Benefits to Surfing a Crowded Lineup? No one will choose to surf a crowded lineup over an empty one because the benefits do not come even close to the downsides, but this is not to say that there can’t be any upsides at all. Teaches You Patience One of the greatest lessons a crowded lineup can teach you is patience. Both for the waves and the people around you. While you wait for your wave, instead of becoming annoyed with the waiting, practice patience, and you will find yourself enjoying the waiting as much as you enjoy the surfing. Teaches You to Work for What You Want Surfing in a crowded lineup means that you cannot simply sit and wait for a wave to come to you, you need to work for it. This lesson, taught through a non-ideal surfing situation, remains true in all aspects of our life and should be contemplated while in and out of the water. Competition Makes You Better Fierce competition can be off-putting, but healthy competition provides an amazing platform for improvement. As you will be fighting for your waves, you will need to surf better than those around you. This will likely mean pushing yourself to the max and learning a thing or two in the process. Teaches You to Deal With Pressure A crowded lineup can become a stressful situation, especially when a set forms further out and breaks on top of the lineup. Although crowds can cause a lot of pressure, learning to deal with this in a somewhat safe environment will begin to prepare you for larger, faster swell and harsher conditions. 15 Tips for Surfing a Crowded Lineup To successfully surf a crowded lineup you need to be prepared for what is to come and pay close attention to details. Finding a balance between respect and fighting for your wave is important. 1. Study the Break You should never go for a surf before you have assessed the waves, currents, weather, and lineup. Doing so can put yourself and others at risk. This is even more important when you will be paddling out into … Read more

Fin Placement on Surfboards: Everything to Know

Fin Placement on Surfboards

Just as the size and shape of your surfboard determine its agility, buoyancy, and stability, so does your fin set up affect the way your surfboard performs. When choosing your fin placement, everything has an impact. The number of fins you use, how close to the nose or tail you place them, the angle that the fins face, the size of the fins, and how close they are together will all play a significant role in the way your surfboard handles. Below is a breakdown of how all these factors affect your ride, and which work best in different situations. Fin Location Fin location affects speed, turning, and stability. This is because the way your board handles comes down to the angles that the water can travel beneath your surfboard. A well-balanced fin placement will provide the most diversity with surf conditions but will underperform when compared to a customized setup. For example, a fin set up created for speed will outpace a balanced board, but will not perform as well when conditions become choppy or the waves become larger. Fin Position Relative to the Board Towards the nose: Fins closer to the nose will feel looser as your back foot does not dig them as deep into the water. Towards the tail: Fins closer to the tail of your board create more stability and hold, but are less agile. You should expect a larger turning radius when your fins are near the tail of your board. Loser to the rails: Fins placed closer to the rails provide less friction and sharper turning angles and reduced stability. Closer to the stringer: Fins in the center of a surfboard create extra drag but hold the board more stable in larger or faster surf. Fin Position Relative to Each Other Closer Together: The closer together your fins are clumped, the faster your board will react to your movements, but the board will feel looser. Fins placed closer together are best for trick surfing in medium-sized swell. Further apart: Fins placed further apart from each other will feel more stable in the water but have a larger turning angle. This fin setup is best for larger, fast, barreling waves. Fin Position Summary Fin position for speed: Fins spread further apart and near the back of the board will provide the least drag with the most stability. Fin position for quick turns: Fins clumped closely together, closer to the nose of your surfboard will slide more and make the board more agile, therefore providing a smaller turning ark. Angle of Fins Just as the position of your fins affects the way your board handles and performs, so does the angle that your fins face, relative to both the center of your board and the board’s belly. The amount of water that flows beneath your board and the angle at which it moves between the fins make a significant impact on how your board feels. The Fin Toe The fin toe, also known as the splay, refers to the angle that your outer fins face in relation to the center fin. Outer fins are usually “toed in”, meaning the front of each side fin is facing slightly towards the centerline of your board. Fins with greater inward angles (toe-in) will respond faster to movements and feel loose while producing more drag. Fins that are set straight (zero toe) will be faster as they allow more water to travel past them at faster speeds, will feel more stable, but will not be as responsive. In short, zero toe fins are faster, steady, and have a wider turning angle, while toed in fins are more responsive, loose, but slower. The Cant A fins cant is its angle in relation to the bottom of your surfboard. The greater the cant, the more the bottom of the fin is angled towards the outside rail. Fins with a zero cant are straight up and down (the base of the fin is at 90 degrees with the base of your surfboard). Fins set with a zero cant will feel faster as they do not create as much drag at the expense of responsiveness. The greater the cant, the more drive you will feel, especially when surfing on the board’s rail. Number of Fins Four major fin setups are commonly used on surfboards. Although most boards will have either a thruster setup or a single fin, there are many surfers worldwide that prefer a more alternative approach. Single Fin Single fins are the fin setup for surfboards and are most commonly seen on longboards . In this setup, only a single large fin is used near the tail of the board and along the stringer. Although single fins are outdated and not used widely in competitions, they are still held dear by many as they provide a different surfing experience. Single fins are often long and wide which provides control over a larger surfboard, but sacrifices maneuverability. If you have not surfed a single fin board before then you may feel unstable and find it difficult to make quick turns, but will experience more speed due to the reduced friction from fewer fins. Twin Fin Becoming popular in the 1970s when Mark Richards used fish boards to win the World Championships four times in a row, twin fins provide extra speed and maneuverability. Twin fins are fixed near the rails of the board and usually in line with the back foot. Twin fins are more stable than single fins but can feel loose in the water as the missing center fin makes deep, sharp angles such as bottom turns tough. Twin fins are ideal for small and medium surf but will likely slide too much in larger swell. Twin setups are primarily used on fish boards but it is not uncommon for a surfer to remove the center fin from their shortboard in search of a different experience for the day. Thruster/ Tri Fin A thruster setup is the most common … Read more

The Difference Between a Grom and a Kook | How to Spot Them

difference between a grom and a kook

A good friend of mine once said, “There will always be a kook or a grom in a lineup. If you don’t know who they are, maybe you’re it.”   As I think of those words today, I reflect on my actions and wonder about how my peers think of me while surfing. Do I act like a kook in the lineup during my bad days? Did I ever dress like one? Was I ever a grom when I was starting? What exactly is the difference between a kook and a grom, anyway?  Surf slang and terminologies can be confusing if you’re new to the surfing world. That’s why in this article, I’ll be talking about certain factors that may label you as a kook or a grom, how you can spot them at the beach, and the basic etiquettes of surfing you should always follow.  What makes you a kook? Contrary to what others know, surfers are a friendly and welcoming bunch. We don’t just call people kooks for no reason, and matter of fact, we like to encourage people who want to learn surfing. That said, being a newbie surfer doesn’t instantly make you a kook.  Being referred to as a kook isn’t exactly what you want to be associated with in the beach lineup, as surfers often use it to poke fun at someone. It’s a term that’s kind of similar to a poser, but since the latter doesn’t exactly surf as they just ‘pretend’ to know how to, kooks can be considered as a more derogatory term.  Generally, a kook is an inexperienced person who often gets in the way of other experienced surfers. They often interfere with the lineup, causing aggravation to others, at the same time disregarding surfing etiquettes and other surfer’s safety. But while the newbies are often referred to as such, surfers of any skill level can be also called as such if they’re acting like one.  Kooks are people who pose danger and threat to other surfers. Since they don’t know (or maybe they do know, they just don’t follow) the basic rules in surfing, they’d drop in on other surfers without batting an eye or snake their way in the lineup while staring at you. Even if they bail out and their boards hit other surfers because they hate wearing a leash, they simply don’t have a care in the world.  Oftentimes, kooks don’t know that they are, indeed, kooks, because they have a distorted perception of their real abilities. They think they’re good at something, but they’re really not. They’d often claim they can do barrel turns and cutbacks, but ask them to do those things and they’d just look like a drowning buffoon in the water. They are also amateur surfers who pretend to be an expert in surfing slang, but they often use words in the wrong context or they exhaust the terminologies in one sentence to the point that it’s cringey.  How to Spot a Kook Since the obnoxious world of being a kook is vast, there are many ways on how you can be considered as a kook by other surfers. If you’re worried that you’re one of them, it’s time to assess yourself and make some changes in your habits. In the list below, you’ll find some tell-tale signs of being a kook and how to spot them at your local beach area. Have tons of stickers plastered on their surfboard (not sponsored) Performs bizarre warm-up exercises in the boardwalk Paddles with the nose of their surfboard pointing towards the sky Sports a top-of-the-line wetsuit, carries a surfboard that looks like it’s never been used, observes the waves for nearly an hour, then jumps in on the waves last minute and creates splashes Carries their surfboards inside malls Never waxes their surfboard, and if they do, they’d ask for yours and give it back as a thin flake of useless wax Wears full wetsuit during summer Wears board shorts over their wetsuit; fashions a wetsuit inside malls Surfs with the wrong equipment in a hot spot for the pros during a big event Ignores channels; drops in on other surfers Doesn’t wear a leash Shows up in beach lots with a frappuccino Takes videos/photos for Instagram Gets excited over two-footers Doesn’t understand surfer norms Last but not least, if you paddle out in a lineup where everybody seems to know one another, then they probably think of you as the kook. Check out this video complication below of some kooks you wouldn’t want to be around with in the beach lineup.  What makes you a grom? While being referred to as a kook can be taken as an insult, getting called a grom can be considered as a compliment — that is, if you’re under the age of 15.  Grom, grommie, or grommet are terms used to compliment young, precocious surfers who are still learning the ways of surfing. These are kids who are stoked all the time because of the high amounts of energy in their veins fueled by ice cream and donuts. Without the groms, lineups won’t be much fun, and half the stores at the beachfront selling sweet treats will be closed for good.   Grommets are the future of surfing, that’s why experienced surfers teach them all the tricks and techniques that they know. They also try to pass down the shaka culture, so the groms can learn the surfing etiquette sooner than later. This way, they don’t develop into becoming kooks as they get older.  These kids are often accompanied by their grom moms, or mothers who take their kids anywhere, any time because they enjoy seeing them stoked. These moms are always sitting on the cold sand, sipping coffee with a blanket wrapped around them as early as 6 am. Like their moms, the groms usually have a positive outlook and a pretty chill vibe.  History of Grom Where did the term grom come from, you ask? While others will … Read more

Should I Surf at High or Low Tide?

Should I Surf at High or Low Tide

Picture this: You’re at this surf town you’ve been wanting to visit for years. You’ve waxed your board, you’ve put on your wetsuit, and now that it’s time to go surfing, you see that all the water’s gone and it’s a hundred meters away from where you’re standing. What the heck!? Some surfers may find light in this low tide situation, while others may not. You may be asking yourself, is it worth it to walk through all that exposed beach? And if you do, will you still be able to find beach breaks and swells at the other end?  Fret not, my friend. In this article, I’ll tell you all about the factors you need to know about the best times for surfing, and whether you should surf during a high or a low tide. What is a high tide and a low tide? First, let’s talk about what these tides are and how they occur. The rise and fall of the oceanic tides, also known as the high tide and low tide, happen because of the sun and moon’s gravitational pull towards the Earth. These occurrences consist of two cycles that are divided into 12 hours each.  You may have noticed that during the full or a new moon, the tide’s high and the waves are bigger. This happens when the moon is closest to our planet, and the influence of its gravity pulls at the earth; therefore creating swelling or a bump where the water naturally drags in. This results in the ‘high-tide effect’.  Meanwhile, on the other side of the planet, they experience what we call the low tide, or the event wherein the water moves away from the shore.  Factors that Affect the Waves Before we dig deeper, let me briefly discuss the other factors that we need to consider in determining which tide you should surf on. Aside from the gravitational pull, other factors affect the tide and waves such as the tidal push, the undertow currents, and the kinds of wind.  The onshore wind is the type wherein the wind from the sea blows in towards the shore, while the offshore wind is the one that blows from the land to the sea. There’s also the cross-shore winds that create choppy waters. Throughout the day, these different winds fluctuate and affect the condition of the waves.  Surfing During Low Tide During low tide when the sea is at its farthest, the water surface is shallow, so the rocks, sandbars, and barnacles of the sea are exposed. This means that the sea is below the tidal range, causing small breaks and weaker waves.  Believe it or not, some people prefer to surf in lower tides when the take-off spot and the water over the reef are not at their maximum depth. Beginners also find low tide a more enjoyable condition to practice in, because when it’s low tide in some locations, the surf breaks with higher waves, and that creates deeper and more pronounced barrels. Again, this varies in the place where you’ll be surfing. Some beaches have the biggest waves an hour after low tide, while others have zero waves as soon as the water moves far back from the shore.  Now, we also have the extreme low tide, wherein the waves fall flat and the reef is at its shallowest. There will be no good breaks at this time, and in this condition, surfing isn’t recommended as it is risky and could be life-threatening.  Surfing During High Tide If you’re an entry-level surfer, you might want to skip surfing during high tide. High tide is when the water is at the top of the tidal range, and because it continuously rises, the waves will push higher, creating fat waves that could become mushy and choppy later on when the tide reaches its peak. In this condition, you can expect lesser crowds, as the waves are harder to ride on and are potentially dangerous. But as intimidating as it may seem, hardcore surfers find extreme high tide a more preferable time to surf, because they see shore break waves as more fun, perhaps maybe even more than reef breaks.  In simple terms, shore breaks are unpredictable waves that break directly into a steep shore. Examples of these are Waimea in North Shore, Oahu, and Teahupoo in Tahiti. These powerful waves are known to break boards and cause injuries to many surfers; however, they still attract hundreds of heavyshore pounders every year.  How to Check the Tides for Surfing The locals know best about their waves; however, if for some reason you’re unable to ask them for the best time for surfing in their area, there are other ways you can know about this.  You can look at the local surf reports, check with your smartphone tide app (My Tide Times, Tide Charts, Tides Near Me, Tide Alert, etc.), or get your own tide-monitoring watch where you can view the tide updates in real-time.  The Best Times for Surfing Now that we’ve discussed the wave conditions of the low tide and the high tide, I will now tell you about the three best times of the day for surfing. Mainly, it’s in the morning before sunrise, during mid-tide, and before the sun sets. I find these to have the least crowd and the most consistent waves; therefore I get the most out of my surfing sessions.  A little bit of disclaimer, though, as these will also depend on your location’s wave conditions and weather. For your reference and safety, please go ahead and ask the locals or other surfers for more information.  Morning/ Before sunrise Have you heard of the popular surfing term ‘dawn patrol’? It’s when a group of surfers go out to surf at dawn, just before the sunrise so they have the first dibs on the waves before the other surfers wake up.  Aside from the lesser crowd, another reason why most people like to surf early in the morning … Read more

Kitesurfing on a Lake | All You Need to Know

Kitesurfing

Not to be biased, but we think kitesurfing might be one of the best sports today. It’s a pretty straightforward beginner-friendly water activity — you don’t need ocean swells or fancy towboats to create wakes to surf on. The only thing you’ll need? Your gear, a massive body of water such as a lake, and the wind (which is totally free).  As kitesurfing on lakes grows in popularity, many enthusiasts discover new scenic locations to kitesurf and measure how you can enjoy this watersport safely. In this article, we’ll talk about all the things you need to know about kitesurfing and more!  What is kitesurfing? In 1970, Gijsbertus Panhuise patented a watersport wherein a rider uses a flat board or a surfboard and holds on to a parachute-type of kite that’s strapped into his harness; and the pull of the wind then enables the rider to move across the water surface. Although the term ‘kitesurfing’ wasn’t commercialized yet during that time, Panhuise was the originator of this concept.  Kitesurfing is the combination of the techniques of different water sports such as surfing, water skiing, paragliding, and skateboarding. Unlike surfing, however, this sport prefers calmer waves and smoother water conditions; hence, why lakes are ideal to kitesurf on.  Kitesurfing on a Lake Bodies of water such as lakes are the most enjoyable for beginner kitesurfers, as they may find choppy waters a little bit more challenging to launch, ride, and land on. Inland kiting is a mid-risk sport, too, as long as there are no interferences like other surfers, banks, buildings, tall trees, or small patches of land where you’ll be kitesurfing.  What You’ll Need  There are five main things you’ll need to start kitesurfing — your kite, twin tips board/directional board, the control bar, a harness, and your safety gear.  Kite Surfing kites are easy to transport as they easily fold when not in use, and they only require a small investment as well. The most common kites are made from inflatable tubes, as they hold and retain their shape and they also float in water. They’re also compatible with any wind range. The one you’ll need, however, will depend on your ability level and feature preferences.  If you’re a beginner or an intermediate kitesurfer, we suggest choosing the SLE, C-Kite, Delta, or Bow-type kites. These are known as all-around kites that generate a sufficient amount of power and lift, and they’re also easy to launch and control even with stronger winds.  On the other hand, the non-inflatable or foil kites are for more advanced riders and racers. These types of compact kites are less stable and harder to maneuver in strong winds, although they produce higher speed and quick turning in lighter gusts. They also don’t require a second person when launching.  As a rule of thumb when choosing your kite — the stronger the wind, the smaller your kite should be. Board Can you use regular surfboards for kitesurfing? Definitely! As long as it’s able to glide in the water, then you can use any kind of board to kitesurf; however, take note that less durable surfboards may not hold up to the strain and pressure of kitesurfing. If you want to purchase a board that’s specifically used for kitesurfing, you should look for twin tips and directional boards.  Twintip kiteboards are the most common ones used in kitesurfing because of the foot straps they come with. This kind allows you to smoothly go in two different directions without switching feet and having to turn 180 degrees. Because of this, hardcore kitesurfers find it easier to perform tricks. Another kitesurfing board is directional, which is kind of similar to surfboards. Directional boards are for riding waves, and as they don’t have foot straps, your feet are more relaxed because you’re not pushing the board, and it also gives you more freedom when it comes to foot positioning.  For beginners, it’s recommended to use larger boards because of their wider surface area. The ideal size of kitesurf boards is those that are 125-150 cm in length and 38-45 cm in width. Control bar/Flying line Now that we’ve discussed the board and kite, what you’ll need next are the flying lines that will connect you to the kite, and the handlebar that will allow you to control your direction. The following are five types of flying lines that are connected to the different parts of the handlebar and the kite.  Backline- used for steering the kite Centerline- keeps your kite up high Connector line- connects the bar to the kite Bridle- balances the kite 5th line- for stability and safety The control bar or handle must be 30-60 cm in length, although this one is more of a user’s preference than a requirement. More or less, there will be four to five lines attached to the bar that will give you leverage and enable you to steer your kite.  Harness Next is the body harness that connects your torso to the control bar. A harness puts less tension in your arms, and they also keep your posture upright while kitesurfing. There are two kinds of harnesses — waist and seat. Safety equipment Whatever your level of experience in kitesurfing, you should always wear safety equipment to keep you safe and prevent you from drowning in case of any unfortunate events. Make sure to wear a life jacket and helmet for head protection if in case you mistakenly land on rocky areas.  Get Started If you have everything that you’ll need, it’s time to briefly learn about inland kiting.  First, since lakes have weaker gusts of wind compared to the beach or ocean, you have to check the wind’s speed before launching. Ideally, a lake must have a sustained wind of at least 15 mph or 13.03 knots so your kite will be able to launch in the air. To check, you will need a wind speed measuring tool called an anemometer. It’s similar to a wind vane, but it’s … Read more

Top 7 Best Workouts for Surfing | Guide

SURFING WORKOUTS, TRAINING FOR SURFING BEST SURFING WORKOUT

From its humble beginnings in 1885 to its mainstream popularity today, surfing remains a gratifying and rewarding pastime. The excitement of being alone on your board in the vast ocean gives nothing but natural high. As stimulating as it may sound, surfing is a physically and mentally demanding activity. It needs you to have a fantastic combination of strength, power, endurance, balance, flexibility, speed, and mental toughness. We listed down surf fitness exercises that will improve your surfing and boost your athletic capacity. The best workouts for surfing will prepare you to tackle more giant waves as your fitness level meets the strength and ability every wave requires you to have. Why Should You Workout for Surfing? The best training for surfing would be, well, surfing too. But, if you are getting three to four sessions a week, it wouldn’t be enough to keep you physically fit in the water. Cody Thompson, a Floridian surfer and personal trainer, suggests that spending an hour inside a musty, halogen-lit gym can appear entirely dissonant for sliding on the waters, but doing so can help your surfing skills in the long run. Thompson says that if you want to become a better surfer, you can ride more waves. But, if you don’t get to surf as often as you wish, you can incorporate into your gym routine some workouts for surfing to keep you in surf-shape. Best Workouts for Surfing Generally, you don’t need to be incredibly fit to surf. Although, it helps if you are relatively active and in shape, can swim a few lengths, and enjoy surf sessions without feeling too exhausted. It can be pretty tricky to train for surfing – you must exercise on land to perform well in the water. You need to prepare your entire body dynamically by imitating the movements on the surfboard. Keeping yourself in surf-shape is another thing. As we’ve hinted above, if you are fit to surf, you can go on surfing for extended hours without feeling too tired. We’ve compiled a list of the best workouts for surfing to improve your surfing and boost your athletic capacity. Squats The main component of most lower body exercise programs is squats, and it is a crucial pattern to surfing. Imagine crouching through a bottom turn, landing at a higher speed with a complete rail turn – the best way to achieve that is to have a strong lower body with healthy joints to move through the full range of motion. Even though many consider them as leg exercise, basic squats are, in fact, a full-body workout. And, it is the best workout for surfing. When you surf, the ankles, knees, hips, and spine support a heavy load, so they need to be as strong as they can be. As you progress, add load and complexity. Some of the squat variations you can try are: Jump squats or going down into a squat and explosively jumping as high as you can from the squat position. Single leg squats or standing on one leg and squatting as low as you can. You can hold on to something for support and slowly let go once you get the hang of it. Bulgarian split squats. Do this while standing straight and raising one leg on a chair or box behind you. Achieve by bending your front knee, lowering your back knee towards the ground, and going as low as possible. Barbell squats. Do this while standing with your feet shoulder-width apart. Hold the bar across your upper back with an overhand grip. Squat down and repeat. Braced squats. This squat variation requires you to hold a weight plate in front of your chest with both hands and arms straight. Then perform a squat while keeping the plate in place. Turkish Get-Ups The amazing benefits for your overall athletic ability are what make Turkish get-ups more popular than ever. Combine them with your surf training program, and it will increase your mobility, joint health, dynamic movements, spine stability, shoulder control, core strength, and many more. As you develop your skill and precision with Turkish get-ups, slowly add some load and go up to 44 lbs (20 kgs) for men and 26 lbs (12 kg) for women. Think through all the dynamic positions you are putting your joints through while surfing. Different hip positions while turning or popping up, shoulder angles as you duck dive or rotate – all of them are encompassed in this workout for surfing. Turkish get-ups are quite a versatile workout that you may choose to utilize this exercise as a part of your surf warmup, too. Push-ups Push-ups are raising and lowering your body using your arms from the prone position. This exercises the pectoral muscles, triceps, and interior deltoids. In short, it builds both the upper body and your core strength. The good old basic push-up will never go out of any workout routine, including workouts for surfing. Push-ups engage your whole body and strengthen the core, align the spine, and improve shoulder control. It is a good workout for surfing, considering the water activity needs a strong upper body for easier pop-ups, duck dives, and injury prevention. For push-ups, alignment should be worked on first. Then the volume or how many more reps you can do. After mastering the classic push-up, you can work your way up to TRX or gym ring push-ups. You may also add weight by elevating your feet or wearing a weighted vest. Ring push-ups – this great progression exercise emphasizes building strength in the stabilizing muscles of the shoulder while increasing coordination and additional muscle recruitment in the chest. TRX push-ups – push-ups performed using the TRX suspension system allows you to use your own body weight as resistance during the movement. Dumbell push-ups – with a dumbbell in each hand while in a push-up position, you can work out by pushing up and rotating 90 degrees to one side, and raising one weight overhead. Clap push-ups … Read more

Top 5 Best Boardshorts Liners (Speedo)

best boardshorts liners

Boardshorts are the perfect choice of clothing when you are looking to spend a day seaside looking out for excellent waves or poolside to cool down on a hot summer day. Its full coverage provides protection for long hours under the sun while letting you move freely in and out of water. Some boardshorts conveniently incorporate a liner made from mesh or similar materials that provide added support. These liners eliminate the need to wear anything underneath the boardshorts. But, what do you wear if your boardshorts didn’t come with a liner? Boardshort liners are available as a separate purchase if the shorts you have don’t come with a liner. As its popularity rose along with boardshorts, the market is saturated with so many to choose from. This article is prepared as your reference for when you are looking for the best boardshorts liners. What Are Boardshorts Liners? Boardshorts liners are separately bought liners specifically designed to give you the support and protection you would expect from regular boardshorts. Generally, they are made of the finest materials and are built to last. These liners are an exceptional choice for what to wear underneath your boardshorts. Since they are made specifically for the water, they are likely to last longer than regular compression shorts. For the most part, these boardshorts liners are made out of the same material as a swimsuit, which makes them in the same way comfortable. Separate boardshorts liners are best at keeping the two fabrics from rubbing against each other and creating unnecessary static. Top 5 Best Boardshorts Liners Reviewed Boardshorts liners are affordable and widely available. But, there are so many of them out in the market that it can be an overwhelming task to pick the best one. We listed down and reviewed 10 of the best boardshorts liners to help you narrow down your search. Speedo Men’s Swimsuit Jammer Endurance+ Solid USA Adult Flow Funky Swim Jammers – Size 21 to 32 Swimming Jammer Shorts for Boys in Ten Radical Swimsuit Designs TSLA Men’s Swim Jammers, Athletic Racing Swimming Shorts Trunks, UPF 50+ Sun Protection Endurance Triathlon Swimsuit Dry Dudz Men’s Hydro-Tech Compression Short Navy O’Neill Men’s Premium Skins UPF 50+ Shorts 1. Speedo Men’s Swimsuit Jammer Endurance+ Solid USA Adult The Speedo Men’s Swimsuit Jammer is engineered using the Endurance+ Fabric technology for a durable design. This fabric is so light that you won’t feel getting weighed down wearing them under your boardshorts. This liner is available in three different colors and in various sizes, too. Its inner drawstring allows for easy adjustment to customize how it fits. You will appreciate how its fast-drying material is chlorine-resistant, so you won’t have to worry about wearing them both in saltwater and pool. The material used in this boardshorts liner doesn’t bunch up, so you will be more comfortable using it. It lessens the instances when you have to readjust during your training. Moreover, its four-way stretch design helps your muscles move better while keeping the shape of the suit. 2. Flow Funky Swim Jammers – Size 21 to 32 Swimming Jammer Shorts for Boys in Ten Radical Swimsuit Designs If you love spending time at the pool or are part of a triathlon team, these Funky Swim Jammers from Flow are another great option. They are comfortable, lightweight, and as the name suggests – they are genuinely funky. This boardshorts liner has fabric that will comfortably fit around your leg and keep all the sand out of the “sensitive areas.” It comes in handy for team practices, swim meets, triathlons, and any activity in the waters. The Flow Funky Swim Jammers come in stylish cuts, colors, and patterns. They are sleek, modern, and form-fitting but with a soft feel. You’ll appreciate how its “V” panel crotch increases comfort and adds to the sportier look. 3. TSLA Men’s Swim Jammers, Athletic Racing Swimming Shorts Trunks, UPF 50+ Sun Protection Endurance Triathlon Swimsuit Whether you are doing weekly laps or surfing, TSLA Men’s Swim Jammers is an excellent addition to your water outfit rotation. Its design, fit, and materials give out that athletic look and feel you want to show off at any water activity. This boardshorts liner is Olympic grade. It is engineered with an upgraded design for maximum Chlorine resistance. So much that you can occupy hours in a Chlorinated pool or salty waters, and they’ll remain durable with retained shape. The TSLA Men’s Swim Jammers feature an interior drawstring for a personalized fit, dual-lined crotch for stable wearing, and flat-lock seams to avoid irritation to the skin. It functions well and performs as intended. 4. “Dry Dudz Men’s Hydro-Tech Compression Short Navy One of the best boardshorts liners for swimming, surfing, or other water activity, the Dry Dudz Men’s Hydro-Tech provides this kind of athletic kind of support. This quick-dry liner delivers a perfect day of moving around and a bunch of activities. This boardshorts liner has an interlocked compression structure that consists of 100% polyester. A design like this allows moisture and water absorption from the fabric itself. In addition, the Dry Dudz superior technology is used particularly around the crotch area to pull away wetness from the skin. Moreover, the Dry Dudz Men’s Hydro-Tech is lightweight and soft. The blend of elastane and polyester makes it appear like you aren’t wearing anything under your boardshorts. Despite that, you still get the most important reasons why you are wearing boardshorts liner – for support and comfort. 5. O’Neill Men’s Premium Skins UPF 50+ Short The O’Neill Premium Skins does an excellent job at keeping your bottoms chaff and irritation-free. More than that, it also provides 50+ UPF protection against the sun’s harmful UV rays. As with most O’Neill gears and wearables, this boardshorts liner is another pinnacle in quality. This wearable sun protection has an ergonomic seam placement. Its four-way stretch poly/spandex blend and quick dry properties deliver an exceptionally soft feel and comfort. It is so efficient that the Skin … Read more

Feed Your Stoke. Join the Surf Hungry Crew

Surf tips, gear reviews and travel guides straight to your inbox

"*" indicates required fields

Privacy*
This field is for validation purposes and should be left unchanged.