What Is A Duck Dive In Surfing?

What is a Duck Dive in Surfing

You might be new to surfing and unfamiliar with terms like “duck dive” and “turtle roll,” or perhaps you’ve heard about them but never practiced them before. In truth, these two techniques will change how you surf forever and make it much easier to paddle to the lineup! So, what is a duck dive, and should you duck dive or turtle roll? A duck dive is a surfing technique that enables a surfer to dive underneath an oncoming wave and more easily paddle out to a lineup. Duck diving is better for big waves and surfboards with less volume, while turtle rolling works well for smaller waves and surfboards with lower volume.  Let’s break down the differences between duck diving and turtle rolling, discuss the benefits and drawbacks of each technique, and go over a step-by-step guide on how to do them. We’ll also cover handy tips for improving these techniques and discuss why they are essential to your surfing toolkit! What Is A Duck Dive In Surfing? A duck dive is a technique that surfers use to safely navigate through oncoming waves when paddling out to the lineup, which is the area where the waves break, and surfers wait for the perfect waves to ride. What Are The Benefits And Drawbacks Of Duck Diving? There are significant advantages to mastering duck diving, but it also comes with its drawbacks. Here are the essential benefits and drawbacks you need to know! Benefits: Duck diving allows you to efficiently navigate through oncoming waves that would other push you back and allows you to keep paddling out to the lineup so you can get into position for the next ride. You’ll conserve a lot of energy by avoiding waves that may push you back toward the shore. Maintaining control of your board is easier, meaning there’s less risk of wipeouts and collisions with other surfers. You avoid long swims back to the beach in case your leash breaks. Drawbacks: Duck diving demands a lot of strength and stamina, especially when it comes to large waves. It takes some practice, especially for new surfers. You must time the oncoming wave perfectly, or you will lose momentum and get pushed back. If you do not duck dive properly, you’ll damage your surfboard. Incorrectly pressing on your board can create pressure dings, delamination, or snap your board. How Do You Duck Dive? While duck diving will take some practice before you master it, here are the steps you need to know:   When you see an oncoming wave, increase your paddle speed before you duck dive to ensure you have enough momentum to dive underwater and back out of the wave.   Using your hands, push the nose of your board nose-first under the water, with your hands in a push-up position and by your side holding on to the rails.   With your hands in a push-up position and holding onto the board’s rails, push the board’s nose under the water. Make sure to push it nose-first to reduce resistance.   Slide your foot up and underneath you so that it’s on the tail of your board, and use it to push down – while still pushing down on your board’s nose with your hands.   Once you and your board are successfully under the wave, release your legs, slide your hands toward your board’s nose, and perform a frog kick to give you a boost of speed to the surface. Tips For Improving Your Duck Dive Paddle hard to gain enough speed so that you can get deep enough for the water’s cylindrical effect to pull you back up to the surface. If you’re going too slow, your board won’t submerge properly, and it will start to wobble and want to surface because of its natural buoyancy. Duck dive as close to the wave as possible so that you can dive underneath the whitewater rather than getting slammed by the force of the water. You must extend and push your board forward after duck diving; otherwise, it may pull you back. Most Common Mistakes Surfers Make When Duck Diving Don’t stop paddling in fear when you see a wave approaching you; you must keep paddling to gather momentum and push through. When you push down the nose of your board, remember to push down the tail, or your backside will remain stuck in the air, and the wave will push you back. Your average board and leash are both 6 feet, plus your body makes 18 feet. Don’t let go of your board because you have about an 18-foot strike range to hit other surfers, so watch your surroundings. What Is A Turtle Roll In Surfing? A turtle roll is a technique that surfers use to maneuver under an oncoming wave and prevent it from pushing them back. It allows them to reach the lineup – the place where waves form – to catch the perfect wave. What Are The Benefits And Drawbacks Of Turtle Rolling? Turtle rolling can be an effective way to hold onto your position in a lineup and save energy, but this technique has benefits and drawbacks. Benefits: You can more easily navigate through larger waves that are too difficult to duck dive. It helps you to conserve energy preventing you from having to paddle around the wave. You’ll avoid getting pushed back and maintain your position in the lineup. It’s an effective alternative to duck diving if you’re a beginner or find it hard to duck dive. Drawbacks: ou must have good timing and technique to avoid getting caught by the wave and tossed around underwater. It can be challenging especially when the water is turbulent, or the wind is howling. If you don’t do it properly, your board can hit and injure you, or the wave will drag you under. If you let your board go, it can injure other nearby or unaware surfers. It’s less efficient than a duck dive because you don’t go as … Read more
Surfing Tricks: How To Take Surfing Next Level

Surfing Tricks

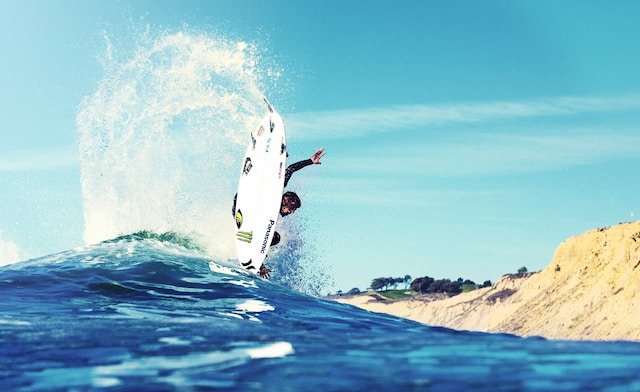
Surfing tricks are some of the most exciting maneuvers you can perform on a wave to add variety to your surf! They require technical skill, balance, and athleticism and range from simple maneuvers like carving and bottom turns to more advanced tricks like aerials and barrel rides. They open new opportunities that level up your surf to the next exciting level, and it starts with how to perform them! You can take your surf to the next level by learning how to do a carve, bottom turn, cutback, floater, and aerial maneuvers like the backflip, 540 & 720, and barrel riding. They make it easier to navigate the waves, add a thrill to your surf, and are essential for pro surfers to impress the judges. When we first learned the joy of running, it unlocked a new world of opportunities for us. The same principle applies to surfing; knowing how to carve is handy for quickly changing direction, while the bottom turn is the key that makes all the other tricks accessible to you. Let’s look at each maneuver and discuss what they look like, how to do them, common mistakes, and tips to improve them! Carving Carving is one of the most essential and exciting maneuvers in surfing. It gives you the power to change direction quickly and drastically by using the power and speed of the wave. Carving also symbolizes style and skill, showing your ability to control your board and ride on the rails. Carving on a surfboard requires executing a forceful 180-degree turn by progressively exerting pressure on the board with either your toes or heels. Typically, you will need to carve your surfboard on a high-speed wave that offers broad, open sections ahead of you to maximize your surfing experience. Keep in mind carving is different from trimming, which is a more subtle way of changing direction by shifting your weight slightly on the board. Trimming helps adjust your position on the wave and maintain speed, but carving is more radical and expressive. How To: Mastering The Art Of Carving Carving is a fundamental skill in surfing, and with practice, it can be an exciting way to ride the waves. Here are 12 steps to help you perfect your carving technique: Begin by catching a wave at shoulder height on the side, known as the shoulder. To gain momentum, initiate a well-executed bottom turn. Drive your surfboard from the bottom towards the crest of the wave. Put pressure on your heel side (frontside) or toe side (backside) without rotating your shoulders. Sink the rail of the surfboard into the wave face. Apply pressure on your legs and look over your shoulder. Place your leading hand into the water. Boost the rotation of your shoulder axis by putting more pressure on your toes or heels. Lengthen your front leg to increase the power in your back foot. When the nose of the surfboard has completed the turn, release the rail before encountering the whitewater. Flatten out the board and examine the base of the wave. Resume riding with a bottom turn.   Tips And Common Mistakes To Consider When Carving Practice carving on both sides (frontside and backside) to develop your balance and coordination. Start with smaller waves and work your way up to bigger ones as you gain confidence and experience. Bend your knees and maintain a low body posture to increase stability and leverage. Use your arms and head to guide your turns and maintain balance. Don’t lean too much on the back foot, or you’ll lose speed and stall. Don’t overextend your front leg, or you’ll lose control and fall off. Don’t shy away from digging deep into the wave and carving hard; it’s better to fall than to play it safe. Bottom Turn The initial turn performed after catching a wave is known as the bottom turn. It’s one of the most critical maneuvers in surfing because it sets up every other move you want to do on the face. A bottom turn involves turning your surfboard at the bottom of the wave, using your rail and your fins to carve an arc on the water. The bottom turn can be either minor or major, depending on how tight and vertical you want to go. A minor bottom turn is used to sweep yourself diagonally to the wave’s face, where you can do maneuvers like top turns, cutbacks, and roundhouses. A minor bottom turn is commonly used on waves with softer shoulders or when you want to maintain speed and flow. A major bottom turn is used to launch yourself vertically to the wave’s lip, where you can do maneuvers like snaps, off-the-lips, airs, and barrels. A major bottom turn is generally used on waves with steeper sections or when you want to attack the wave with power and aggression. Perfecting Your Bottom Turn: 6 Easy Steps The bottom turn is a handy maneuver in surfing that helps you generate speed and set up for more advanced maneuvers. Following these six steps, you can perfect your surfing technique and propel you to the next level. Take off as steep and late as possible to gain maximum speed. Time your bottom turn: delay it as long as possible without losing speed. Keep a low stance: bend your knees to keep your balance. Keep your feet centered over the stringer: your weight must be evenly distributed. Steadily apply pressure on your toes (frontside) or heels (backside), and let the surfboard’s rail find the water’s surface. Once you’ve started climbing up the wave face, pump for speed, stall for tubes, kick out, or prepare for another maneuver. Bottom Turning Like a Pro: Common Mistakes To Avoid on’t go too low off the bottom of a wave, or you’ll lose most of your speed. Avoid racing too far out in front of the section and overlooking your bottom turn marker, making you miss the wave’s best part. If you don’t compress through the bottom turn … Read more

Surfing Mobility Exercises: Surf Performance

Surfing Mobility Exercises

Surfing is an addictive sport that is healthy for the body and mind. But the activity comes with a large portion of physical and mental demands, along with a side order of risk. It uses the entire body and requires focus. But as holistic as the sport is, it doesn’t provide everything. Hence the need to incorporate surfing mobility exercises to help reach peak performance and minimize risk. Surfing mobility and strength exercises increase mobility in the hips and spine and improve core strength, protecting your back, shoulders, and neck. They boost stability in key joints, such as hips, knees, and ankles. They can also improve flexibility which enhances your agility and power. Surfing, like gymnastics and ballet, requires the body to be strong and flexible but have stability. If the body isn’t flexible enough, strokes are inefficient, the popup is cumbersome, and the dexterity on the board is lacking. Yet, if the back hyperextends and essential joints wobble, balance is lost, injury risk is raised, and performance suffers. This is why surfing alone will not achieve peak performance. Introduction To Surfing Mobility Training Surfing mobility training incorporates off-the-water exercises that improve strength, flexibility, and stability while reducing injury risk. Exercises can be cross-discipline, using exercises found in yoga, Pilates, and the gym, such as squats. However, most are performed on stable surfaces, as studies have shown that doing so on unstable surfaces can have detrimental results. In short: surfers already have enough unstable surface training by virtue of their sport. They must incorporate on-the-ground exercises and stretches to create a more holistic regime. Benefits Of Surf Mobility Exercises For Surfers The benefit of surf mobility exercises for surfers is better performance while reducing injury risk. For instance, rotation of the shoulders, trunk, and hips is essential for creating powerful, dynamic turns that are fun and wow the crowds. But these maneuvers are not just a matter of power and suppleness. Flexibility combined with power that lacks control can lead to hyperextension injuries in addition to lacking the agility and grace surfers crave. In addition, the body must be able to cushion itself from the forces exerted against it, and there are many thanks to the variables of the sea and the sport. So again, surf mobility exercises enhance a surfer’s performance on the water while making them less likely to be injured. In the end, the better we take care of ourselves, the longer we can enjoy the sport. Top Surfing Mobility Exercises To improve Surf Performance Ready to get started in your new on-the-ground training regime? Here are some top surfing mobility exercises to improve your surf performance. Hip Mobility Exercises Hip strength and mobility are crucial to surfing. They and the pelvis connect the upper body with the lower. If hips are stiff and weak, they impact surfing performance and cause injuries to the back and lower extremity joints, especially in the knees. Many people who think they have bad knees actually have tight hips. However, too many surfers leap into dynamic stretches without establishing the fundamentals. So before you get fancy, start with some basics. 90/90 Hip Stretch The 90/90 hip stretch is the foundation for many advanced surfing mobility exercises for the hips. Sit down on the floor. Extend your right leg in front. Bring your right foot towards your left hip until you have achieved a 90-degree angle. Your knee and outer thigh should remain on the floor and be extended forward. The calf and ankle should align with the bent knee, parallel to your pelvis. Extend your left leg out, in line with the hip. Keeping your thigh straight out from the hip, bend the knee so your left calf and foot point straight back. Both legs should now be at 90-degree angles, making L shapes. Keep your torso upright. Keep your shoulders and pelvis squared. Breathe into the stretch. After holding for 20-60 seconds, change the legs, with left in front and right in the back. Hold again. Watch this Youtube video for how to do the basic 90/90 and begin to increase it into a more intense stretch. Curtsy Lunge Front, back, and side lunges are taught in PE classes around the United States and are excellent for exercising the hips. But the curtsy lunge is only starting to gain the recognition it deserves and should be part of every surfer’s mobility exercise regime.   Begin standing, feet shoulder-width apart Step your right foot back like you’re going to curtsy. Thus, your right foot is left of your left foot. Now bend the knee (and pretend you’re in The Game of Thrones). Return feet to side by side. You can now alternate or do all the reps on one side first before switching. As you improve, feel free to add some weight.   Do better with visuals? Here’s a YouTube demonstration. Shoulder Mobility Exercises Surfing makes high demands on the shoulders, from paddling out to the all-essential popup. The joint must be strong and supple yet have rock-solid stability, or injury will occur. Here are two stretching and posture exercises to incorporate into your routine. The Sleeper Stretch The sleeper stretch focuses on improving range and rotation by concentrating on the teres minor and infraspinatus muscles. The stretch technically needs no equipment, but you will find it more comfortable with a pillow under your head.   Lie on your right side. Bring the right elbow out, in line with your shoulder Bright your right hand up so the arm is now making an L. Take your left arm and press the right hand toward the ground Hold where you meet resistance for 30 seconds Release, bring the L back up, and repeat When finished, repeat the exercise on your left side   Need a visual? Here is a YouTube demonstration of the sleeper stretch. Standing Wall Angel And Advanced Variation The standing wall angel is excellent for posture and scapular control.   Find a nice, flat wall you can lean … Read more

Surfing: How To Pop Up: A Step-By-Step Guide

Surfing: How to Pop Up

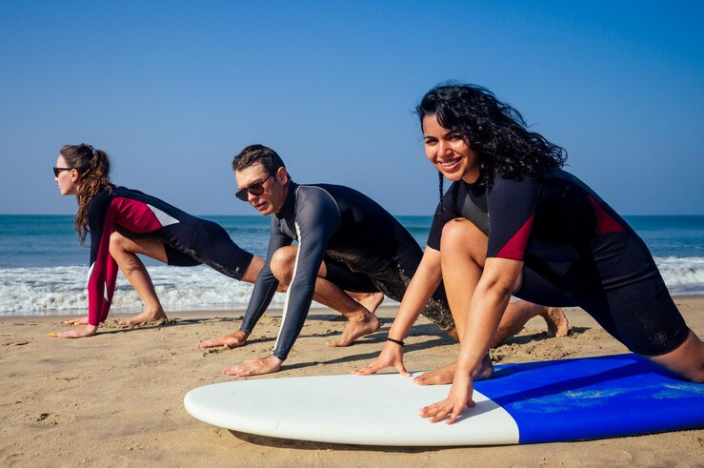
As a beginner surfer, there are many things to learn and master before you comfortably ride most waves. One of the essential skills you’ll need to learn is how to “pop up” because you’re only bodyboarding without it. Fortunately, this article provides a step-by-step guide on how to pop up for those embarking on a surfing adventure. The key to a successful pop-up on a surfboard is your position on the board, correct foot and hand placement, a balanced stance, and practicing the movements until they are natural. Core strength, balance, and coordination are essential for mastering the various pop-up techniques. Once you’ve learned how to paddle the board, the next important technique to learn is how to pop up. Although this beginner’s technique is fundamental to surfing (especially on a longboard or foam surfboard), it is tricky to master. This article focuses on the push-up and slide method for popping up. Start In The Right Position Fundamental to executing the pop-up technique is starting in the right position. Picture this. You’ve paddled out through the surf and joined the lineup. You’ve waited patiently (it’s a busy day), and it’s finally your turn. You paddle hard; the wave starts pushing you. In your excitement, you stand up, but alas! You’re too far back, and your board stalls. How could you avoid this? By being aware of your body’s position on the board before standing up. Where You Lie On The Surfboard Is Essential While paddling out to the waves requires certain body positioning (so you don’t fall off when going over/under waves and swells), once you’re in position, ready to catch a wave, you’ll need to lie on your stomach again in a way that maximizes your paddling capabilities. I.e., lie where you can paddle quickly with your arms so that the wave catches and drives you along. You want to lie far back enough that the surfboard’s nose is in line with, or just above, the water. Too low and you’ll nose dive; too high, the back of the board sits too low in the water, creating drag. Unfortunately, this drag results in the wave not pushing you along sufficiently. You’re too far back if your surfboard’s nose is 30° (or more) above the water. Lying in the correct spot takes practice. As a beginner, you won’t always get it right. If you surf with friends/a group, ask for pointers as you wait for waves (unless you plan on an out-of-body experience, seeing yourself from the side is challenging). Another great way to learn about the ideal position is to ride a few waves lying on a surfboard (like a bodyboarder). Although it may feel embarrassing, you’ll learn where to position yourself and what it feels like when a wave takes you. Preparing For Pushing Up On A Surfboard Once you’re correctly positioned and the right wave approaches, start paddling! You’ll paddle between four and eight strokes to move fast enough to catch a wave. Enough speed is essential for a pop-up, and part of the correct position is moving ahead of the wave. If uncertain, give an extra one or two paddles to ensure you travel with the wave. Once the wave takes over, put your hands (palms down) on the board with your fingers pointing to the surfboard’s nose. They should be next to your pectoral region. If you’re on a longboard, position your feet with the toes down on the surfboard’s tail (most beginners start on longboards, as they are easier to balance and the wave catches them quicker). Congratulations, you’re ready for a push-up! Push Up and Slide Your Feet Although there are four different pop-up methods, the push-up method is the easiest for beginners to master. This technique is ideally suited to longboards and large foam boards. Once you’re moving along with the wave and your hands are in position, push your body up and away from the board, pivoting on your toes on the surfboard’s tail. Slide your feet underneath yourself when your body is above the surfboard (your arms are stretched to their maximum, giving you as much space as possible). As strange as it sounds, the best method for this slide is to bring your back foot (if you stand regular, then your right foot, if you stand goofy, then your left foot) forward first. Your back foot should end roughly in line with your other leg’s knee. Once the back foot is in position, you’ll move the “soon-to-be” front foot forwards and place it between your hands with your knee bent under your chin (ideally, you want to land with your front foot roughly in the middle of the surfboard). Now you’re ready to stand up. Take your hands off and step up. Note: Although you can move your front foot into position first, you risk landing too far back on the board, which would cause you to stall and fall. Tips On Perfecting The Push Up And Feet Slide It’s important to push with the same force on both hands; otherwise, you might tip the board one way.   Keeping your hands on the board while sliding your feet helps you maintain your balance and speed (by keeping the nose sufficiently down).   Try not to grab onto the rails (side of the board). Your hands under the board create drag and could cause you to topple over.   You’ll need to be able to push your body up and hold it on your hands and toes, so a degree of physical strength (arms, core, legs, etc.) is necessary. You’ll hold roughly 80% of your body weight on your arms, freeing up your legs to move forward.   Look ahead of you when pushing up. If you look at your feet, you’re likely to fall.   Don’t worry about trying to move both feet and land them on the surfboard simultaneously. Rather, focus on sliding the backfoot into position, followed by the front foot forward.   When you’ve … Read more

How To Get Past the Break On A Longboard

How To Get Past the Break On A Longboard

Longboarding is both thrilling and graceful, often appearing as if you’re dancing on the waves! If you have trouble dealing with the break, you might end up wiping out or missing the best part of the wave! Here are the best techniques and tips for beginners and pros to get past the break on a longboard. You can get past the break on a longboard by using the push-up technique to lift your torso off your board and allow the water to pass between you and the board. Then, use the rocket ship technique, where you use your weight to launch yourself over the wave, and turtle rolling to roll under the wave.  A lot goes into getting past the break on a longboard; you need to consider the volume of your board and the width and keep a constant speed. We’ll cover all the crucial factors and follow a detailed step-by-step guide using the push-up, rocket ship, and turtle roll techniques. We’ll cover tips pros use and examine the differences between paddling with longboards and shortboards. Paddling Out In Big Surf On A Longboard You might really enjoy using your 6’6 Foamie board with 44L of volume – its superior buoyancy and stability are unparalleled, making riding the waves much more enjoyable! While this is true, these factors also make it more challenging to negotiate the waves when you paddle out. Duck diving is a handy technique that you can use to dive under an oncoming wave to avoid getting pushed back. It requires you to push your surfboard under the water, which can be difficult with a longboard board with a high volume (buoyancy) and stubbornly refuses to sink. So, how do you get past the whitewater on your longboard? Getting Past Whitewater On A Longboard: Step-By-Step Guide While you can’t completely stop oncoming waves from pushing you back, you can control by how much. You can use a few methods to help you get past the whitewater and paddle out comfortably at a good pace. We’ll examine the raised method, the rocket ship, and turtle rolling.  The Push-Up Technique Increase your paddling speed toward the approaching whitewater or the lip of the wave. Speed is vital to help you build momentum and maximize the chances of the technique working. When the whitewater is about to hit you, use your arms to lift your torso up and off the board. This will ensure the whitewater passes between you and your surfboard, significantly reducing the resistance you feel from the wave. If you want to take the push-up technique further, you can also perform a hop motion to lift your feet into the air and off the board. The less water hits your body, the less resistance you’ll experience. This method is ideal for moderate-sized whitewater because if the whitewater is taller than you, it will lift you and push you backward. The Rocket Ship When you see the approaching whitewater, sit up and move to the back of your board, raising your board‘s nose into the air. This is important for gaining the necessary momentum for the next step. As the whitewater is about to hit you, reach your arms as high up your board as you can, and pull your weight toward your board’s nose. Watch your timing; if you don’t have enough weight at the nose of your board when the wave hits, you’ll flip backward. Shooting yourself forward with your weight will help you to propel yourself up, out of the water, and over the wave. The rocket ship is excellent for dealing with smaller waves or when the waves are too big for the push-up technique, but more powerful waves will lift you up and possibly turn you on your back, so be careful! Turtle Rolling Accelerate into the oncoming whitewater, keeping your board perpendicular to the wave (facing the wave). Use both hands and grab the rails of your surfboard. Shift your body off your board and into the water, turning your board upside down so that you are underneath it and holding it with both hands. When the whitewater hits you, jab it with your board to reduce resistance. Once the wave passes, climb back onto your board and continue paddling out. Turtle rolling is ideal if there’s a wave breaking right in front of or on top of you. Rip Currents: How To Use Them To Your Advantage If you’ve spent time in the ocean or have experience with surf lifesaving, you’ve probably heard about rip currents. While they do carry a negative connotation due to their safety risks, experienced surfers often use them to make it back to the lineup much quicker. A rip current results from water rushing back into the ocean after hitting the shoreline. When this process happens for long periods, small-scale erosion forms channels that allow the water to return to the sea. These channels are often deeper than the sand around them, which means that waves don’t break in the rip current itself. Here’s how to spot a rip current:   Dark patches of water deep-colored water Fewer breaking waves Rippled surface surrounded by a smooth surface Anything floating beyond the waves (foamy, discolored sandwater) Rip currents are dangerous, so practice safety first, and if there’s a lifeguard on duty, swim where they can see you and between the allocated flags. Longboarding Vs. Shortboarding: Which Is Easier To Paddle? Longboards and shortboards are loads of fun and excitement in their own right, but when it comes to paddling, longboards are easier to paddle than shortboards. Let’s look at the facts:   Length – longboards are longer than shortboards, which means they have more glide and momentum on the water. This makes them easier to paddle and catch waves with. Shortboards are shorter and require more effort and speed to paddle and catch waves with.   Width – shortboards are narrower and require more skill and agility to paddle and maneuver. Longboards are wider than … Read more

Common Surfing Injuries: What You Need to Know

Common Surfing Injuries

If you enjoy adrenaline, speed, water, and risk, surfing may be the sport for you. But before you get in the water, it is always good to know about the possible injuries you may sustain, and understanding how to avoid them is equally important. Though one of the biggest fears for anyone catching waves may be shark-related, some injuries are much more common. Below, we discuss them in detail. The most common surfing injuries include dislocations, concussions, and head injuries, but may also include more specific injuries such as “surfer’s ear.” Though you may be unable to avoid them all, using the right equipment and practicing body awareness may help reduce the risk of serious injury. Whether you’re newer to the sport or a veteran surfer, knowing the injuries you may sustain and how to avoid them is valuable information to keep yourself safe and prepared in any situation. Let’s look in more expansive detail at the most common surfing injuries. We’ll also give you more detail on how to avoid these injuries and ensure you stay safe the next time you go chasing waves. Common Surfing Injuries Though there are more injuries that you may sustain while surfing, the list below is some of the most common ones. Surfer’s Ear Surfer’s ear, though common under surfers, isn’t a surfing-only injury but gets caused by prolonged exposure to cold water. Due to repeated exposure to water under 66°F, the ear’s bone develops growths that, while not initially harming the person, may cause other problems such as hearing loss, water getting trapped, and a build-up of thick or dry skin in the ear, along with recurring infections. Head Injuries And Concussions There are many possible ways that head injuries may occur while surfing, one of the most common being a surfboard hitting a surfer. With this in mind, some after-effects may include dizziness, confusion, and blurry vision. If a surfer sustains repeated head injuries, there may also be a chance of serious cognitive issues. Though concussions and other head-based trauma are common under surfers, there is also a chance that a concussion may result in loss of consciousness, with studies showing that up to 9% of participants have lost consciousness due to head trauma while surfing. Shoulder Dislocations As with many other sports, surfing also carries the possibility of dislocation, with shoulder dislocations being some of the most common. Shoulder dislocation may happen for many different reasons but putting your shoulder back into place as soon as possible is imperative since relocating after a dislocation can become more painful if you wait. You may be able to use one of these many techniques to fix your shoulder if you have the help of others; however, in severe cases when surgery is needed, it must get followed with immediate rehabilitation to ensure you can continue surfing. Ankle And Knee Sprains Another set of common surfing injuries are spraints, usually ankle or knee spraints, that may occur due to a wave hitting you too hard or slipping off your surfboard. Unfortunately, this is a common surfing injury since it is easy to have one foot slip off your surfboard while the other remains on the board; with the added pressure from a wave, it is easy for your foot or leg to go in the wrong direction. Cuts And Lacerations From Fins And Other Equipment Cuts and lacerations are the most common surfing injuries and can happen because of your or someone else’s surfboard or equipment or even because of rocks you can’t see or steer clear of. Though some of these may not be serious surfing injuries, it is always best to examine them to ensure you do not get an infection that may keep you out of the water for an extended time. Sunburn And Skin Damage Whether you were out for too long and sustained sunburn or have redness or rashes due to your wetsuit or chafing, these injuries can be very annoying, though they may not be the most severe. You can use several things to protect yourself from getting injured this way, but they are still some of the most common surfing injuries and can make your surfing experience less than optimal. Though most of the skin damage you may sustain as a surfer is minor, there are reports that surfers may be up to three times as likely to develop melanoma, a form of skin cancer. How To Prevent Surfing Injuries And Stay Safe In The Water Below we discuss some ways to avoid injuries and stay safe in the water. Wear Protective Gear, Including Helmets And Rash Guards Protective gear is essential while surfing, and it is best to remember that having fun in a way that will not lead to injury is much more important than looking good. If you want to enjoy surfing for a long time, using protective gear such as helmets to protect you against head injuries and rash guards to help prevent rashes is vital. Many people also recommend using full-length wet suits to help prevent sunburn and the possibility of developing melanoma. Practice Good Surfing Technique And Body Awareness Bad technique and not practicing good body awareness can cause many common surfing injuries discussed above. Whether you’re newer to the sport or have been surfing for years, good technique and body awareness are essential for keeping yourself and other surfers safe. If you use the correct surfing techniques, you lower the chance of sprains, dislocations, and head trauma due to collisions, and body awareness can also help you avoid cuts. Warm Up Properly Before Surfing Another great way to avoid sprains, tears, and dislocations is doing warm-up exercises before you get on your board. Some essential areas to warm up and get loose before you get into the water are your arms and shoulders, legs, glutes, ankles, and neck and back, if possible. You can find some great exercises here if you want to ensure your body is ready … Read more

Surfing & Skating: How Skating Can Improve Your Surfing

Surfing and Skating

No two sports have had such a major impact on one another. Skating and surfing have been intrinsically interlinked ever since the first surfers in California invented skating back in the 50s. Surfers began trying to “surf’ outside the water and skating quickly, progressing into the radical skateboarding we see today. The maneuvers skaters learned out the water translated perfectly back into the Ocean, and both disciplines developed into their own separate counter cultures and million-dollar sports industries.  In this article, we dive into the relationships between surfing and skating. We’ll explore the history of how surfing started skateboarding, how skating pushed surfing in terms of progression, and how skating made surfing more radical. We’ll also check out the different styles of skating, from surf skate carving to traditional skating. Finally, we look at how skateboarding can help improve your surfing. It’s a super interesting relationship, and there are no two similar sports. We have a bit to get through, so let’s dive in.  Surfing Vs. Skating  While both sports have similar aspects, surfing involves riding waves in the ocean, while skating involves riding a smaller board on land. This describes both disciplines in straightforward terms; surfers usually ride larger boards and may change their equipment based on conditions, whereas skaters will typically ride similar style boards. There are many ways to ride waves in surfing, from performance short boarding, long-boarding, barrel riding, big wave surfing, and fun-board riding. While skating comprises park, bowl, and street.  Surf Skate & Traditional Skateboarding (Similarities & Differences)  Surfing  Board riding in water in varying ocean conditions  Combines face turns, barrel riding, and Arial maneuvers. Styles include performance shortboard, longboarding, fun boards, and big wave surfing.   Skating  Board riding on land using a smaller board.  Combines rail, flatland, bowls, and parks.  Skating styles differ from bowl skating, street skating, and park skating.  How Skating Improves Your Surfing  There’s no doubt that skating can help improve your surfing. Because you’re not relying on conditions and ever-changing variables like wind, tide, swell, and sand, you can repeat and practice the same moves repeatedly. This makes the rate at which you progress in skating much higher than in surfing. So, if you can’t get in the water (nothing can replace surfing), go skating. Here are some transferable sports skills that will help you surf better.  Balance  Balance is a vital component of both surfing and skating. Both require an incredible degree of balance for even the most basic maneuvers. So, if you’re riding a skateboard when you can’t ride a surfboard, your body replicates the next closest body movement. Because your body is repeating similar actions, it triggers your muscle memory, making everything from stance, and moves more familiar.  Footwork  The small movements you do with your feet in skating and surfing are transferable. More so in surfing, when you perform advanced moves, you change your foot position back and forward based on your turn. Pushing and adjusting your feet as you skate helps you do this when you surf.  Maneuvers  Several moves in surfing are directly related to skating. If you’re using a carver surf/skateboard, moves such as pumping, carving, and even snaps are almost the same. So, if the waves are crappy, jump in a half pipe or bowl and practice pumping and carving repeatedly getting this constant repetition is the best land-based method of replicating surfing.  Co-ordination   Perhaps one of the biggest crossovers between surfing and skating is having the ability to use the top and bottom half of your body to be in sync to perform maneuvers and gain speed.  The Origins of Skating & Relationship to Surfing  Back in the 1950s, a group of surfers in California were sick of the wave-starved summers and crappy waves, so they devised a way to “surf” on land. This involved attaching rollerblading wheels onto boards and performing surfing-type moves on land. This is how skateboarding was born.  After a draught in the 70s in California, surfers began using drained swimming pools to skate in, performing more radical maneuvers and learning airs. Because of how replicable and repeatable skating was, as conditions didn’t change like in surfing, skating progressed rapidly. Things got radical, and surfers soon began translating futuristic moves like airs and carves into the water. So essentially, things came full circle, from surfing starting skating and then skating progressing so quickly that it pushed surfing to be more radical.  Christian Fletcher was one of the pioneers to start translating skateboarding airs to surfing, while Kelly Slater also used moves from Skateboarding to change how waves were surfed–sparking the Momentum generation (If you haven’t seen the movies, I’d highly suggest you check them out) and surfing in a way that combined the new school flare with old school flow. As surfers continue to push what’s possible in terms of airs and above-the-lip moves, skating and surfing remain more closely linked than ever before.  Final Thoughts  Surfing and skating have a harmonious relationship. With surfing influencing the start of skating and then skateboarding getting radical so quickly, it influenced surfing and pushed surfing further than anyone could ever have imagined. While nothing can replace surfing, skateboarding is, by far, the closest thing you can get to surfing on land.  So if you don’t live near the sea and can’t get in the water as much as you’d like, the next best thing is skating. You only have to look at John John Florence’s skating to see how transferable some skills are between the two sports. An interesting history and two of the most closely related sports on earth. When you can surf, surf, and when you can’t, skate–you’ll improve your surfing exponentially. Luke MorrisLuke Morris is an avid athlete and the driving force behind Surfhungry, a vibrant online platform dedicated to sharing the joy and passion of surfing and water sports with enthusiasts around the world. With a deep-rooted love for the ocean and a lifelong commitment to riding waves, Luke’s journey as a surfer has … Read more

Surf Training on Land: How to Train

Surf Training on Land

Nothing can replace surfing, and no exact movement replicates what we do when surfing a wave. However, we don’t all have the luxury of surfing all day, every day–dedicating our entire lives to improving our surfing. I know how it is. Life gets in the way, responsibilities crop up, and finding time to surf and chase swells falls by the wayside.  But don’t stress; this doesn’t mean you can’t improve your surfing. There are countless ways to help you stay fit, flexible, and stronger when you can’t get in the water. While I would highly encourage you to surf as much as possible, if you live far from the Ocean or just can’t find the time, it’s time to start doing surf-specific training.  In this post, we dive into land-based surf training; from what can be done to most accurately replicate surfing, the key fitness components you should focus on on land, to the importance of mobility and stretching in surfing. We’ll also discover how to create a land-based surf training program. A lot goes into getting fit for surfing, so let’s get down to it.  Replicating Surfing on Land – Is it Possible?  Because of the tiny movements you make in surfing and an ever-changing ocean, it’s super tricky (even with all the technology we have at our fingertips) to replicate the moves in the ocean. I think one of the best ways to do it is simple: watch surf movies and try and replicate the body movements you see in clips.  Do this in your room when no one’s looking because it looks ridiculous. But this way, you get your body and mind used to the positions you need to perform certain maneuvers. I used to do this as a kid all the time! I also used to walk down the street pretending a bush was a long tube, adopting an upper-body tube stance as I walked along. And yes, I’m not afraid to say I still do this, aged 26.   Additionally, mobility routines and stretching exercises can help mimic surfing movements. Putting your body in the same positions you do in surfing will help your flexibility and muscle memory. Despite this, training outside the water doesn’t have to focus on surf-specific movements. Training with “gimmicky” surf-specific routines can have an adverse effect! Just look at the best surfers in the world to see how they train; take Nate Florence and Gabriel Medina; in their training, they perform explosive, power-based body weight exercises in circuit-style sessions.  Surf Workouts  We have several fitness-based components in surfing, including power, strength, cardiovascular fitness, and flexibility–all essential in good surfing. Whenever top surfers are training, they focus on these aspects. Here’s how they relate to surfing.  Strength  The stronger you are, the easier surfing will be. Paddling, pushing through turns, duck diving, and how long you can surf for. Muscular strength and endurance are slightly different muscle-based but equally essential fitness components. While muscular endurance helps you surf for longer (and be able to practice more), muscular strength and power will give you the ability to push through turns and throw spray.  Power  All the maneuvers we do in surfing are fast and explosive; therefore, power is critical. Successful tour surfers have power in their game, big legs, strong cores, and the ability to torque and throw their boards around. Even basics such as popping up or performing an off-the-top are quick (fast twitch) movements, and power-based exercises help you perform them better.  Cardio  Cardiovascular training is essential for surfing. The fitter you are, the longer you can surf, the easier paddling and riding waves will be, and the more waves you catch. More waves = more improvement. If you don’t surf all the time, cardiovascular training such as running, cycling, and swimming will undoubtedly help you feel better in the water. Even if you surf a lot, this type of training helps you keep motivation and froth levels high when the waves suck (which is more often than not).  Flexibility  Flexibility and mobility is the most crucial factor to consider when it comes to surfing well. Everything in surfing requires flexibility, from paddling (shoulders), popping up (hips), and top turns (hips, ankles, back). If your muscles are tight, you won’t just feel sore from surfing but will be limited in the maneuvers you can perform. The Championship Tour surfer is super flexible, and this is no accident.    Mobility & Stretching  Rather than focusing on land-based surf replication, stretching will be more beneficial in helping you surf better. A good stretch routine (while watching a great surf movie to see how surfers move) is a great way to stay limber and flexible. I recommend starting a daily stretch routine first thing in the morning, making some flowing, fluid movements to get the blood flowing, and then into a great yoga routine. Establishing this long-term routine can help you feel better when you do get to surf.  Post-surf stretching is also super important! If you surf, then sit at a desk all day, it leads to stiff muscles and soreness. A recipe for injury! But stretching, even for 30 minutes, post surf, can work wonders in helping your body feel good for the next session.  How to Create a Surf-Specific Workout Routine  The best surf-specific routine focuses more on developing; strength, power, cardio fitness, and flexibility than trying to replicate what you do in surfing completely. These things combine to make surfing easier and less tiring when you get in the water.  Make stretching a habit (both morning and post urf), A movement-based, flowing routine in the morning and a deep post-surf stretch session.  Try and do 3 x strength bases sessions per week. (Adapt depending on how much you surf that week). Perform bodyweight exercises such as push-ups, lunges, dips, squats, jumps, and spider craws. These are dynamic movements that incorporate the entire body. These are great for strength and muscular endurance as part of a circuit.   Cardio Sessions: If … Read more

Surfing Travel Insurance | Protecting Your Trip & Gear

Surfing Travel Insurance

The list of surf trip costs is endless, from flight tickets to accommodation, transport, food, travel gear, and a new board or two if we’re lucky, and that’s not to mention any coaching and extra activities. But one thing often overlooked, particularly on a budget surf trip, is surf travel insurance—an annoying additional cost but one that is just as essential as your plane ticket.  We’re all guilty of it, right? “Ahhh, it’ll be fine; I won’t need insurance; that would be a waste if nothing goes wrong.” On surf trips, everything is, and hopefully will be, fine until it isn’t. Surf trips, by nature, are unpredictable, and there are countless opportunities for things to go awry.  But when things go to sh*t, they go to sh*t very quickly, and paradisical dreams can turn into life-threatening nightmares in seconds. If you’ve got no cover to back yourself up in emergencies, then you not only put yourself in a dangerous (and potentially life-threatening) situation but under a mountain of debt you’ll be paying back for years to come.  However, with a small pre-trip payment, you can prevent such situations and give yourself the peace of mind you won’t finish the trip with a $10,000 medical bill, injured or stranded. Surf travel insurance can also cover you for other surf trip mishaps, such as delayed flights and lost or stolen baggage. In this article, we dive into everything you need to know about surf travel insurance, from what to look for, the essential criteria, why you need it, and the best companies to buy policies from. We have a heap to get through, so let’s dive in.  Why Do You Need Surf Travel Insurance?  If you’ve been on a surf trip, you won’t need me to tell you how many things can and inevitably will go wrong. From severe injuries and emergency evacuations to stolen boards and delayed flights, surf travel insurance helps you in countless ways:  Serious Injury Death  Minor surf accidents  Traffic collisions (Bali mopeds)  Delayed flights  Broken surf equipment  Lost or stolen baggage  Natural disaster  But while the list of potential surf travel mishaps is long, not all surf travel insurance companies cover these things. Instead, you’ll have to look at specific policies to see what is and isn’t covered on your respective policy. Always check your policy wording carefully, and no matter what insurance you get, here are the essential criteria for any surf travel insurance policy.  Essential Surf Travel Insurance Criteria  Medical Expenses  This is the big one. Medical expense coverage is crucial for any surf trip. Whether going on a mellow longboarding vacation to Sri Lanka or chasing slabs deep in the Australian desert, medical expenses cover your medical bill should you get injured.  For example, if you’ve fallen off and hit the reef at Ulutwau, gotten cut up, and potentially broken a bone, you need to go to the hospital to get checked out and have a cast put on. That doesn’t come free for foreigners in Indonesia. With medical expenses covered by your policy, you can get the care you need without worrying about paying for it immediately.  To hammer the importance of this home, I was once on a surf trip to Lakey Peak, Sumabwa, a relatively remote Indonesian surf paradise. One day we were eating lunch, and a surfer was being paddled in from the surf, having badly broken his leg and needing urgent medical attention and pain relief. His friends informed us, and everyone else at the camp, he was an American with no travel insurance!  They did a whip round to get as much money together as possible, which I’m sure didn’t completely cover the cost of his hospital transfer and treatment. This is exactly the situation you want to avoid, and for the sake of a few extra dollars, it’s stupid not to get insurance.  Medical Evacuation  For serious injuries and life-threatening situations, medical evacuation insurance is needed. Hopefully, you’ll never need this, but when you do, you’ll be super thankful you had it! Let’s say you’re on a surf trip to the Mentawaiis (if you’ve been there, you’ll know how frickin remote it is). You get a head or spinal injury from hitting the shallow reef and need urgent care.  The closest hospital is Padang–usually a 4-hour boat trip, but you need a helicopter to airlift you to the hospital in Padang. Padang isn’t the biggest city, and if the hospital there isn’t equipped to deal with your injury, you’ll need to be transferred to Singapore or Kuala Lumpur! Yep, that’s a lot of flying, and costs soon rack up. Medical evacuation covers these costs essential.  Personal Liability  Another vital aspect of your surf travel insurance coverage is personal liability. In short, this means an injury you cause to someone else. It doesn’t matter how good a surfer you are in crowded line-ups; it only takes a misread of an oncoming section to run over someone. Personal liability coverage helps cover their medical expenses if you injure or seriously hurt them. This is essential for helping them get the care they need (regardless of their insurance) and gives you the peace of mind of not having to pay for their medical expenses.   What Does Surf Insurance Typically Cover?  What’s covered in your insurance policy will depend on who you purchase cover with, and not all policies will cover the same thing. For example, you’ll want to cover bases such as medical expenses, evacuation, and personal liability, but often things such as baggage delays, damage to equipment, trip cancellations, etc., are things you buy as extras on top of your policy. Well worth considering.    Types of Surf Travel Insurance  For surf travel insurance, there isn’t a specific company that operates as a sole surf travel insurance provider. Therefore, you must look for extreme sport and adventure travel companies that offer surfing insurance. These companies provide travel insurance for backpackers traveling long term (6 months +), extreme sports … Read more

How to Stay Warm When Surfing in Cold Water: Top Tips for Toasty Waves

person surfing on waves in winter - wondering how to stay warm when surfing in cold water

Where I live in Western Australia, we happen to get our best swell in the winter months. As a cold-water winter surfer, I know firsthand how important it is to know how to stay warm when surfing in cold water in order to enjoy the waves. Cold temperatures can quickly sap your energy and make it difficult to perform at your best. With that in mind, I’d like to share some tips on how to stay warm while surfing in cold water. One of the key elements to staying warm during those frosty surf sessions is paying close attention to how we protect our extremities, like our hands and feet. These body parts are typically more exposed to the elements, and as a result, they require some special consideration. In the next sections, I’ll be discussing the different ways to keep your hands and feet warm while riding those chilly swells. What Do Surfers Do to Stay Warm in Winter Wetsuits and Accessories When I surf winter swells in cold water, I make sure to wear a good quality wetsuit with the appropriate thickness to keep my body warm. Thick neoprene wetsuits, especially hooded ones, provide extra insulation against the cold. I also wear essential wetsuit accessories like gloves, booties, and earplugs to protect my extremities and prevent heat loss. Gloves and booties keep my hands and feet warm, while hooded wetsuits and earplugs protect me from cold water flushing and possible ear infections. Techniques and Tips One important tip I follow to stay warm when surfing is to keep moving in the water. I paddle regularly and stay active, as this helps in maintaining my body temperature and blood circulation. Avoiding unnecessary duck dives also helps in retaining body heat by not submerging myself and the surfboard beneath the waves when it is not needed. I don’t know about you, but the old ‘doing a wee in the wetsuit’ offers a bit of immediate relief too and is a classic surfer’s trick where I’m from (Haha, sorry, too much information!?) Diet and Nutrition In order to maintain my energy and body temperature while cold water surfing, I plan a nutritious pre-surf meal. High-calorie foods rich in carbohydrates, proteins, and healthy fats provide fuel to my body and help me stay warm. Fruits and vegetables with high water content might not be the best choice before cold water surfing, so I opt for more substantial meals instead. Coffee and alcohol might be tempting for a quick fix, but they are not advisable as they can reduce my body’s core temperature. Of course, a hot drink and warm feed immediately after surfing is a great way to warm back up again too. I personally love the Aussie classic of a hot choccie and a sausage roll with tomato sauce! Preparing for Winter Surfing Before heading out for a winter surf, I make sure to warm up by stretching and doing light exercises. Having a warm and insulated van to change in and gather my gear is a great way to start my session comfortably. It’s also a good idea to keep a changing poncho and a container of warm water handy for rinsing and warming up my hands and feet after a surf. Understanding Water Temperature I always consider the water temperature before a winter surf session. Knowing the ideal wetsuit thickness and accessories needed for specific water temperatures helps me prepare better and stay warm while surfing. For instance, thicker wetsuits and extra accessories like hoods and gloves might be essential when water temperatures drop significantly, certainly this is needed when I surf in the colder south eastern states of Australia in the winter; I can only imagine what it’s like in parts of Europe and the USA (you guys are mad!). Rejuvenating after a Cold Surf Session After a cold surf session, I focus on rejuvenating my body and warming up quickly. A hot shower, warm drinks, and dry clothes help me regain my body temperature and recover faster from the effects of cold water surfing. I also make sure to refuel my body with a nutritious post-surf meal to replenish energy and restore balance. In Australia, we surfers wear ugg boots – sheepskin wool lined boots; in fact you wouldn’t be a surfer in winter in Australia unless you pulled your uggies on straight after your feet were nearly dry (even with sand on them, the lot!). Don’t let the cold water stop you chasing epic waves! Get the right gear, eat the right foods, warm up quickly and enjoy the winter swell! Luke MorrisLuke Morris is an avid athlete and the driving force behind Surfhungry, a vibrant online platform dedicated to sharing the joy and passion of surfing and water sports with enthusiasts around the world. With a deep-rooted love for the ocean and a lifelong commitment to riding waves, Luke’s journey as a surfer has inspired him to create a community where like-minded individuals can come together to celebrate their shared passion.

Feed Your Stoke. Join the Surf Hungry Crew

Surf tips, gear reviews and travel guides straight to your inbox

"*" indicates required fields

Privacy*
This field is for validation purposes and should be left unchanged.