How to Surf: A Beginner’s Guide to Surfing

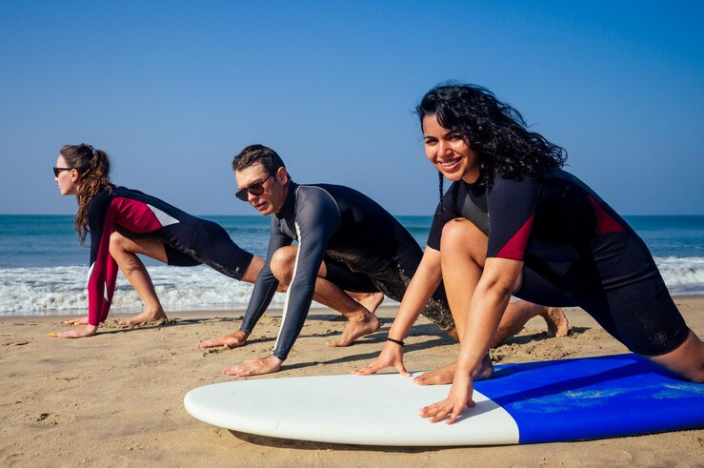
If there is one thing advanced-level surfers won’t admit to you, they wouldn’t want to teach you how they do it. Experienced surfers may be off, silent, and awkward when you begin to ask questions. They may come off as arrogant and self-absorbed.  But it is for a good reason.  Surfers started as beginners, too. They experienced not being able to control the waves they faced. Despite the vastness of the ocean, it gave them limited resources – or, to put it merely, waves to learn how to ride. These waves, however, came in different shapes and sizes.  This reality is what surfers want you to figure out for yourself. Every wave comes differently. A specific style confronts particular types of waves. One that will make you look and feel good while staying safe.  Learning how to surf, as with most sports, is not easy. Some who have tried have gone bored because of the slow learning curve. But, others stay because that’s the most exciting part – challenging oneself to improve in every ride.  What is Surfing?    Surfing is next to swimming and diving as the most popular water sport. It is the act of riding on the waves. People who surf are called surfers. Customarily, surfer surf by lying, kneeling, or standing up on the surfboard. Over time, it evolved to body surfing and windsurfing, too.  In surfing, the wave rider rests on the forward part of a surfboard, facing a moving wave that typically brings the surfer toward the shore. Although oceans have more suitable waves for surfing, riders made it possible to ride even in lakes or rivers. This sport started as an essential activity in Polynesian culture. It goes back to the 4th century AD when Polynesians made their way to the Hawaiian Islands from Tahiti and the Marquesas Islands. These folks brought with them their colorful customs. One of which is playing on waves using their Paipo boards.  Surf riding is also linked to riding waves on planks and single canoe hulls. Historians also believe in its connection to fishing. The ancient Peru culture surfed on reed watercraft fishing.  Surfing was introduced to the Western world when three teenage Hawaiian princes took a break from their boarding school in 1885. They brought to their trip to Santa Cruz, California, their custom-shaped redwood boards, and rode the mouth of the San Lorenzo River.  George Freeth, an American lifeguard and swimming instructor, was the credited “Father of Modern Surfing.” He and a colleague, Hawaiian surfer Duke Kahanamoku introduced surfing to the United States. Surfing is more than just a sport nowadays. It is now a culture that waves represent diversely. Some riders surf as a recreational activity, while others make it the center of their lives. It is most dominant in the US and Hawaii; however, its popularity is slowly getting known in other parts of the world.  Beginners Guide to Ride The Waves Surfing is not an easy watersport to learn. Learning to ride the waves could take weeks or sometimes even months, depending on your skill, fitness, the conditions of the waves you ride, and the frequency of your practice sessions.  Back when surfing was not as big as it is now, there weren’t any surfing schools that you can turn to ask to teach you how to surf. Surfers then relied on watching experienced riders do their thing and then trying it on their own.  Now, every surfing community has a surfing school. It is a happy sight to see kids, teenagers, and young adults trying to learn. It is impressive to see them ride waves. Surfing schools are a great help in boosting the popularity of this watersport and improving your surfing skills at the same time.   However, if you want to learn how to surf through the good old “learning by yourself,” here are a few tips you can take note of and memorize by heart.  Step 1. Condition and Prepare Your Body for Your Training Like most sports, you should prepare your body to endure the physical exhaustion of multiple training sessions. You will need more than just strong legs, but right arms’ strength, powerful shoulders, and a tough back.  Why? Simple. You will be spending 99% of your time paddling through the waters with your surfboard in a prone position. You will be drained after one to two hours of paddling, and you might wake up the next day with a very sore upper body.  Prepare yourself for training with physical activities like push-ups, pull-ups, and some dips. A little cardio such as running or jumping rope will help, too. Train yourself to balance with a surf skate or a balance board. Step 2. Try It Out First With Bodysurfing We mentioned in step one how that paddling would eat the majority of your learning time. Therefore, beginners usually have their surfboards under their arms. This practice is so that they master the art of paddling. Beginners typically give up at this point, as they feel frustrated that they aren’t doing anything but paddle.  In reality, paddling is the essential knowledge you need to arm yourself with. When you’ve mastered paddling, the natural sequence is bodysurfing. Riding the waves with your body allows you to feel and understand the waves as they crash into your board or vice versa.  All you need to do is to get into the water with your swimmers. Try to catch some tiny waves and let them push you back to the shore with your body in full extension. It adds fun to the learning part, and it leaves you with a deep feel for the wave, allowing you to learn when you should push into it.  Once inside the swell and grasped its energy and momentum, it will give you the sense of learning how to steer and maintain speed. Body surfing is like body dragging in kite surfing. It is a crucial step that is an absolute prerequisite for anyone … Read more

Best Surf Camps for Beginners

Best surf camps for beginners

If you have an affinity for the beach and want to immerse yourself in the whole beach experience, there is no better sport to get into than surfing. It’s exhilarating, relaxing, and a lot of fun. There are many surf camps worldwide and some genuinely awesome ones in the US. Surf camps are a fast-growing industry that caters to anyone who is keen to learn to surf. From travel surf camps, adult learn-to-surf, and beginner’s schools, surf camps provide anyone with a desire to surf with the best opportunity to learn quickly. Surf camps are one of the best ways to learn to surf. They are well organized and allow for continued practice under the guidance of trained and skilled instructors. The benefits are many, so let’s look at how and why surf camps are so helpful and go into everything you need to know about surf camps. Introduction: Discovering the World of Surf Camps for Beginners As impressive as surfing may look to a beginner, paddling out into the ocean and standing on a board is frightening. Enter the surf camp. Surf camps provide one of the best possible ways to learn to surf. Surf camps are also excellent options to keep the kids busy and valuable for helping them learn if they don’t know how to surf. Reputable surf camps provide everything you or your kids may need to learn to surf. Let’s peek at the benefits you can reap from attending a surf camp. Benefits Of Beginner Surf Camps To start, surf camps allow beginners to learn within a safe and secure environment with constant supervision and guidance. Many camps include lodging and meals, making it a lot easier for the learning process as all you are required to focus on is surfing. A considerable benefit of a beginner surf camp is that instructors can guide you on proper technique, which may take years to get right if you’re trying surfing on your own. As beginner surf camps are made for learning to surf, another top benefit is that all gear will be provided for, and any further requirements will be made clear before the camp commences. A beginner surf camp is a great way to relax, learn something new and make new friends. Being within a group of like-minded people with the same skill level as you will mean that you all start from scratch and progress at a similar pace. Learning to surf at a beginner camp will also help you push yourself further, and with two to three sessions a day, your chances of coming out of the surf camp and being able to command the basics of surfing are very high. Many beginner surf camps cater to youngsters aged 5 to 17. Surf camps can last half a day to over a week and are well worth the money. It’s an excellent way to keep kids busy during the vacation, where they will get outdoor exposure, a good workout, and have a ton of fun. Surf camps can also be a more budget and stress-friendly option. Surf camps are one-stop shops, with almost all costs included in the price. With everything included, you don’t have to do the math of adding everything up. What To Expect? The first thing you can expect from surf camp is to have a great time. You won’t be standing on the first day, and many camps may have you starting in a pool as you get used to your board and practice techniques. Whether you opt for a luxury camp or a budget one, you will have a ball. It’s an excellent way to build confidence without the hassle of breaking waves. Within a day or two, you will move to the beach and learn how to navigate waves and balance. There is enough free time to spend on relaxation, so it’s the perfect way to mesh learning and vacation. Top Surf Camps for Beginners As a beginner, everything will be new and unknown, so what do you need to look for when choosing a surf camp? This is what we are on the lookout for when selecting a surf camp. Good reviews, check reviews, and if you know of past attendees, talk to them. The equipment included is much easier and kinder on the budget if the camp provides all your gear. At most, there are five people per instructor. The more people there are, the less one-on-one time you will get, and you will need the instructor to spend some time with you to get things right. When looking for beginner surf camps, if you would prefer to learn in the US, many options are available. Hawaii, California, South Carolina, and New Jersey have several surf camp options. Pacific Coast Surf Camp caters to ages 7 to 17 years, based in Bolinas, California. Sunrise Surf Academy caters for ages 5 to 16 years, based in Venice Beach and Pacific Palisades. Sunset Suzy caters to ages a minimum of 6 years, based in Oahu Hawaii Swell Surf Camps cater to adults located in the Dominican Republic. Surfivor Surf Camp caters to adults in Emoriz, Portugal. LaPoint Surf Camp for adults in Ahangama, Sri Lanka. Best Surf Camps for Solo Travelers Surfing camps have many significant advantages for solo travelers. Not only is your surfing gear provided for you, but so is your entertainment. If you’re a solo traveler who wants to learn to surf, or even if you already surf but want to improve and be surrounded by similar people joining a surf camp is a great way to spend your vacation. As a solo traveler, as much as it’s great to see the world on your own, it’s always fun to be exposed to new people and forge new friendships. A surf camp provides immediate company; as it’s surfing, you can be sure there will be like minds. Surf camps also offer added security and safety for those traveling alone as you automatically become … Read more

Best Surfing Tricks for Beginners

best surfing tricks for beginners

When you begin a new sport, such as surfing, you must learn the basics. The basics of any sport allow the athlete to grow in confidence and master more advanced tricks in the future. So, before you focus on the gnarliest tricks done by professional surfers, focus on getting the basics right. The best surfing tricks for beginners include the pop-up, the bottom turn, and the cutback, and these tricks, when practiced repeatedly, will lead the surfer to be able to do more advanced tricks. The best intermediate surfing tricks for beginners include the top turn, floater, and off-the-lip.  In the article below, we will dissect the best tricks for beginner/intermediate surfers and provide a step-by-step guide on executing them. The best thing about starting with the best basic tricks for beginner surfers is finding a certain flow to your surfing. Best Surfing Tricks for Beginners: A Guide to Getting Started Technically speaking, before you focus on any of the best surfing tricks for beginners listed in the article, the first and one of the most important tricks to master is paddling. You will struggle to get in the best positions to perform the various surfing tricks without a good paddling technique. Surfing is a water sport where a surfer uses a board to ride the face (forward section) of a moving wave toward the shore. The surfer must employ a variety of basic tricks and proper techniques to successfully surf a wave and evolve into the best water athlete possible. Here’s a list of the key basic surfing tricks for beginners, and if you’re new to the sport of surfing, it’s highly suggested that you master them first: Basic Surfing Tricks for Beginners: The Pop-Up One of the most fundamental tricks of surfing is called the pop-up. The maneuver gets you from lying to standing; ultimately, you can’t surf if you can’t perform a pop-up, as you need to be on your feet when surfing. Think of the pop-up as a single-motion push-up that is both explosive and fluid simultaneously. Try the following steps when practicing the pop-up. Step 1: Positioning Your Body on the Surfboard The correct body positioning on the board is vital when performing a pop-up. Ideally, you want to lay in the sweet spot of your board, not too far forward and not too far back. Balancing in the middle of your board, called the sweet spot, makes paddling more efficient, resulting in good speed and maneuverability while out on the water. Lying too far back will result in too much weight on the tail, slowing the board down and counterproductive to planning. Lying too far to the front of the board will result in more planning speed and forward momentum, but the chances of nosediving increase. Before you perform a pop-up, lie on your stomach with your feet together (toes pointing towards the back of the board) and your hands on the surfboard close to your shoulders. Step 2: Find the Right Position in the Water Moving around and positioning yourself in the water is a required skill when you want to catch a wave. Scan the horizon for the right wave and paddle towards it to position yourself in the right position. Start paddling to shore to ride the wave when it reaches you and lifts you. Step 3: Push Your Body Up and Pop Up by Sliding Your Feet When you’re on the wave (wait for the lift), you must push your body up by using your core muscles, hands, and arms and sliding your feet forward. The aim is to land on your feet in the stance you have practiced on dry land. Swing both legs under you when pushing your body up. Your front foot must be near the board’s center, and your back foot should be near the tail. Your knees must be bent, and your weight distribution should be centered over the board for the best balance. If everything goes swimmingly, you should manage to surf the wave. Pat yourself on your back as you have performed what surfers call the pop-up. Helpful Hint – Practice your pop-up technique on dry land until your body learns and stores the memory in muscles. The more comfortable you become on land and regarding technique, the better your pop-up will feel when doing it in the water. Here is a helpful video if you’re struggling with your pop-up technique. Basic Surfing Tricks For Beginners: The Bottom Turn When you can perform the pop-up, a new set of beginner tricks must be mastered. One of these is called the bottom turn. The bottom turn is used to control your ride down the line in a smooth and effective manner. Step 1: Move Down the Wave Surfing involves moving to different parts of the wave to maximize the ride. After you pop up, the next thing to do is to ride the wave. As you go down the wave, your body should be in a crouch position. Make sure to focus on the spot of the wave where you want to go and use your extended arms for balance. Step 2: Keep Your Weight on Your Back Foot When reaching the bottom part of the wave, the aim is to keep your weight on your back foot, as you will need to launch the board into a pivotal turn and redirect it towards the face of the wave. Step 3: Launch the Board Up the Face of the Wave When you reach the bottom area of the wave, weight on the back foot, you need to push the tail of the surfboard down, turning it up to face the face of the wave. Keep your arms extended for balance, with your knees slightly bent, focused on where you want to go. The bottom turn sets you up to successfully ride down the line and rejoin the wave in surfable areas. Here is an excellent video on perfecting the bottom turn featuring Patrick … Read more

What Is A Duck Dive In Surfing?

What is a Duck Dive in Surfing

You might be new to surfing and unfamiliar with terms like “duck dive” and “turtle roll,” or perhaps you’ve heard about them but never practiced them before. In truth, these two techniques will change how you surf forever and make it much easier to paddle to the lineup! So, what is a duck dive, and should you duck dive or turtle roll? A duck dive is a surfing technique that enables a surfer to dive underneath an oncoming wave and more easily paddle out to a lineup. Duck diving is better for big waves and surfboards with less volume, while turtle rolling works well for smaller waves and surfboards with lower volume.  Let’s break down the differences between duck diving and turtle rolling, discuss the benefits and drawbacks of each technique, and go over a step-by-step guide on how to do them. We’ll also cover handy tips for improving these techniques and discuss why they are essential to your surfing toolkit! What Is A Duck Dive In Surfing? A duck dive is a technique that surfers use to safely navigate through oncoming waves when paddling out to the lineup, which is the area where the waves break, and surfers wait for the perfect waves to ride. What Are The Benefits And Drawbacks Of Duck Diving? There are significant advantages to mastering duck diving, but it also comes with its drawbacks. Here are the essential benefits and drawbacks you need to know! Benefits: Duck diving allows you to efficiently navigate through oncoming waves that would other push you back and allows you to keep paddling out to the lineup so you can get into position for the next ride. You’ll conserve a lot of energy by avoiding waves that may push you back toward the shore. Maintaining control of your board is easier, meaning there’s less risk of wipeouts and collisions with other surfers. You avoid long swims back to the beach in case your leash breaks. Drawbacks: Duck diving demands a lot of strength and stamina, especially when it comes to large waves. It takes some practice, especially for new surfers. You must time the oncoming wave perfectly, or you will lose momentum and get pushed back. If you do not duck dive properly, you’ll damage your surfboard. Incorrectly pressing on your board can create pressure dings, delamination, or snap your board. How Do You Duck Dive? While duck diving will take some practice before you master it, here are the steps you need to know:   When you see an oncoming wave, increase your paddle speed before you duck dive to ensure you have enough momentum to dive underwater and back out of the wave.   Using your hands, push the nose of your board nose-first under the water, with your hands in a push-up position and by your side holding on to the rails.   With your hands in a push-up position and holding onto the board’s rails, push the board’s nose under the water. Make sure to push it nose-first to reduce resistance.   Slide your foot up and underneath you so that it’s on the tail of your board, and use it to push down – while still pushing down on your board’s nose with your hands.   Once you and your board are successfully under the wave, release your legs, slide your hands toward your board’s nose, and perform a frog kick to give you a boost of speed to the surface. Tips For Improving Your Duck Dive Paddle hard to gain enough speed so that you can get deep enough for the water’s cylindrical effect to pull you back up to the surface. If you’re going too slow, your board won’t submerge properly, and it will start to wobble and want to surface because of its natural buoyancy. Duck dive as close to the wave as possible so that you can dive underneath the whitewater rather than getting slammed by the force of the water. You must extend and push your board forward after duck diving; otherwise, it may pull you back. Most Common Mistakes Surfers Make When Duck Diving Don’t stop paddling in fear when you see a wave approaching you; you must keep paddling to gather momentum and push through. When you push down the nose of your board, remember to push down the tail, or your backside will remain stuck in the air, and the wave will push you back. Your average board and leash are both 6 feet, plus your body makes 18 feet. Don’t let go of your board because you have about an 18-foot strike range to hit other surfers, so watch your surroundings. What Is A Turtle Roll In Surfing? A turtle roll is a technique that surfers use to maneuver under an oncoming wave and prevent it from pushing them back. It allows them to reach the lineup – the place where waves form – to catch the perfect wave. What Are The Benefits And Drawbacks Of Turtle Rolling? Turtle rolling can be an effective way to hold onto your position in a lineup and save energy, but this technique has benefits and drawbacks. Benefits: You can more easily navigate through larger waves that are too difficult to duck dive. It helps you to conserve energy preventing you from having to paddle around the wave. You’ll avoid getting pushed back and maintain your position in the lineup. It’s an effective alternative to duck diving if you’re a beginner or find it hard to duck dive. Drawbacks: ou must have good timing and technique to avoid getting caught by the wave and tossed around underwater. It can be challenging especially when the water is turbulent, or the wind is howling. If you don’t do it properly, your board can hit and injure you, or the wave will drag you under. If you let your board go, it can injure other nearby or unaware surfers. It’s less efficient than a duck dive because you don’t go as … Read more

Surfing: How To Pop Up: A Step-By-Step Guide

Surfing: How to Pop Up

As a beginner surfer, there are many things to learn and master before you comfortably ride most waves. One of the essential skills you’ll need to learn is how to “pop up” because you’re only bodyboarding without it. Fortunately, this article provides a step-by-step guide on how to pop up for those embarking on a surfing adventure. The key to a successful pop-up on a surfboard is your position on the board, correct foot and hand placement, a balanced stance, and practicing the movements until they are natural. Core strength, balance, and coordination are essential for mastering the various pop-up techniques. Once you’ve learned how to paddle the board, the next important technique to learn is how to pop up. Although this beginner’s technique is fundamental to surfing (especially on a longboard or foam surfboard), it is tricky to master. This article focuses on the push-up and slide method for popping up. Start In The Right Position Fundamental to executing the pop-up technique is starting in the right position. Picture this. You’ve paddled out through the surf and joined the lineup. You’ve waited patiently (it’s a busy day), and it’s finally your turn. You paddle hard; the wave starts pushing you. In your excitement, you stand up, but alas! You’re too far back, and your board stalls. How could you avoid this? By being aware of your body’s position on the board before standing up. Where You Lie On The Surfboard Is Essential While paddling out to the waves requires certain body positioning (so you don’t fall off when going over/under waves and swells), once you’re in position, ready to catch a wave, you’ll need to lie on your stomach again in a way that maximizes your paddling capabilities. I.e., lie where you can paddle quickly with your arms so that the wave catches and drives you along. You want to lie far back enough that the surfboard’s nose is in line with, or just above, the water. Too low and you’ll nose dive; too high, the back of the board sits too low in the water, creating drag. Unfortunately, this drag results in the wave not pushing you along sufficiently. You’re too far back if your surfboard’s nose is 30° (or more) above the water. Lying in the correct spot takes practice. As a beginner, you won’t always get it right. If you surf with friends/a group, ask for pointers as you wait for waves (unless you plan on an out-of-body experience, seeing yourself from the side is challenging). Another great way to learn about the ideal position is to ride a few waves lying on a surfboard (like a bodyboarder). Although it may feel embarrassing, you’ll learn where to position yourself and what it feels like when a wave takes you. Preparing For Pushing Up On A Surfboard Once you’re correctly positioned and the right wave approaches, start paddling! You’ll paddle between four and eight strokes to move fast enough to catch a wave. Enough speed is essential for a pop-up, and part of the correct position is moving ahead of the wave. If uncertain, give an extra one or two paddles to ensure you travel with the wave. Once the wave takes over, put your hands (palms down) on the board with your fingers pointing to the surfboard’s nose. They should be next to your pectoral region. If you’re on a longboard, position your feet with the toes down on the surfboard’s tail (most beginners start on longboards, as they are easier to balance and the wave catches them quicker). Congratulations, you’re ready for a push-up! Push Up and Slide Your Feet Although there are four different pop-up methods, the push-up method is the easiest for beginners to master. This technique is ideally suited to longboards and large foam boards. Once you’re moving along with the wave and your hands are in position, push your body up and away from the board, pivoting on your toes on the surfboard’s tail. Slide your feet underneath yourself when your body is above the surfboard (your arms are stretched to their maximum, giving you as much space as possible). As strange as it sounds, the best method for this slide is to bring your back foot (if you stand regular, then your right foot, if you stand goofy, then your left foot) forward first. Your back foot should end roughly in line with your other leg’s knee. Once the back foot is in position, you’ll move the “soon-to-be” front foot forwards and place it between your hands with your knee bent under your chin (ideally, you want to land with your front foot roughly in the middle of the surfboard). Now you’re ready to stand up. Take your hands off and step up. Note: Although you can move your front foot into position first, you risk landing too far back on the board, which would cause you to stall and fall. Tips On Perfecting The Push Up And Feet Slide It’s important to push with the same force on both hands; otherwise, you might tip the board one way.   Keeping your hands on the board while sliding your feet helps you maintain your balance and speed (by keeping the nose sufficiently down).   Try not to grab onto the rails (side of the board). Your hands under the board create drag and could cause you to topple over.   You’ll need to be able to push your body up and hold it on your hands and toes, so a degree of physical strength (arms, core, legs, etc.) is necessary. You’ll hold roughly 80% of your body weight on your arms, freeing up your legs to move forward.   Look ahead of you when pushing up. If you look at your feet, you’re likely to fall.   Don’t worry about trying to move both feet and land them on the surfboard simultaneously. Rather, focus on sliding the backfoot into position, followed by the front foot forward.   When you’ve … Read more

How To Kitesurf For Beginners: Tips And Tricks

How To Kitesurf For Beginners

Kitesurfing is undoubtedly among the most fascinating and thrilling water sports ever, yet getting started remains incredibly daunting for interested beginners. Inexperienced kite surfers are known to find the initial stages frustrating due to the extreme water sports’ steep learning curve; however, with a suitable instructor, location, and gear, you’ll be addicted before you can blink. The early stages of learning kitesurf can be tricky for beginners; most can individually operate their board, kite, and harness after 10 hours of lessons. Surprisingly, kitesurfing is significantly easier than it seems, making it the ideal activity for anyone brave enough to try.  Despite frequently appearing as an intimidating and hazardous water sport exclusively reserved for hardcore enthusiasts, kite surfing has developed into the fastest-growing extreme sport globally as it is straightforward to learn, incredibly exhilarating, and globally prevalent. Starting your journey to becoming a skilled kite surfer is the best decision anyone can make, as this article will demonstrate. Can You Teach Yourself To Kitesurf? While it is technically possible to teach yourself to kitesurf, it is not advisable. It is vital to remember that kitesurfing is classified as an extreme water sport, making it hazardous for beginners. Due to the numerous high risks associated with kitesurfing, beginners should purchase several lessons from a qualified instructor before attempting to master the sport without the appropriate assistance. Despite the costs of taking kitesurfing lessons from a qualified instructor, the long-term benefits significantly outweigh the initial time and financial investment. In addition, undertaking kitesurfing lessons with an experienced professional instructor will engrain the extreme water sport’s fundamentals into your mind and muscle memory, making it far easier to progress. Initially, a qualified instructor will demonstrate how to set your gear best up, how to land and launch your kite, and the most effective way to control your board. You will learn vital safety procedures, enabling you to safely release your kite during an emergency while ensuring you know how to avoid unforeseen hazards. If you cannot afford or do not currently have access to a qualified kitesurfing instructor, you can teach yourself. While it is not recommended and is associated with a high level of danger, teaching yourself how to kitesurf is not impossible. However, starting your journey in shallow or calm waters, such as a relatively sheltered lake, is vital. Utilizing a less powerful kite with less power is essential in mitigating as many of the associated hazards as possible. Before you venture into the lake, you should ensure you are equipped with appropriate safety equipment, such as: An impact vests A helmet A rugged safety leashes Teaching yourself how to kitesurf may save money initially, although working with an experienced instructor will make your learning process safer, more enjoyable, and less frustrating. How Long Does It Take To Learn To Kitesurf? The number of hours, days, or weeks required to learn how to kitesurf will vary from person to person, depending on their determination, prior experience, fitness levels, and weather conditions. Most kitesurfing experts agree that learning the extreme water sport can take 10 to 12 hours of dedicated practice with a qualified instructor. It can take you longer than 12 hours of intense practice. In that case, you should not be discouraged, as once you understand the fundamentals, the remainder of the learning process is significantly more straightforward. At the same time, grasping the most influential concepts regarding kitesurfing can take less than 10 hours, especially when you have a fair amount of prior experience, determination, and inherent skill. It is vital to remember that kitesurfing’s learning process is not a standardized one-size fits all approach. The best way for beginner kite surfers to learn the basics of the beloved extreme water sport is by practicing for an hour each weekday for a few weeks. While this may not always be possible, the closer the sessions are together, the more streamlined the learning process will be. How Many Kitesurfing Lessons Do I Need? There is no pre-determined number of lessons beginners need to learn how to kitesurf safely. Experts note that your current budget, commitment levels, and learning objectives directly influence the specific number of lessons required. While some inexperienced kite surfers can kitesurf without the help of an instructor, it is highly recommended to take between three and five lessons before venturing out on their own. It is generally accepted that after three lessons, most people can kitesurf without requiring assistance from a qualified instructor. However, committing to ten or more lessons is the most reliable approach if you want to enhance your skills, take the extreme water sport up full time, or attempt thrilling jumps. What Is The Minimum Age For Kitesurfing? Currently, there is no globally accepted minimum age associated with kitesurfing, but most kitesurfing schools require beginners to be 12 years old before they start their first lesson. It should be noted that some kitesurfing schools will accept people younger than 12 years old, although most prefer not to as it exposes them to unnecessarily high levels of legal risk. In addition, the few kitesurfing schools willing to accept people younger than 12 usually require a parent or legal guardian always to be present. While there are ways to learn how to kitesurf before age 12, it is not recommended for most children as the physical and mental demands can be severe for anyone of that age. It is also crucial to fully consider your child’s current physical and mental maturity before thrusting them into the unforgiving and occasionally hazardous oceans. Any experienced kite surfer will agree that the world’s most popular extreme water sport requires significant coordination, strength, and agility. While everyone has some form of coordination, strength, and agility, the essential characteristics are usually underdeveloped in people younger than 12. If your enthusiastic kid is younger than 12, it is recommended to consult your local kitesurfing school and instructor thoroughly. If the instructor is confident about a positive outcome for your child, allow them … Read more

Best Beginner Surf Spots USA | Ultimate Guide

The Best Beginner Surf Spots USA | Ultimate Guide

Surfing, often termed as the “sport of kings,” has gained immense popularity over the years. The rush of catching a wave and riding it with finesse is an experience like no other. Whether you’re a seasoned pro or just dipping your toes into the world of surfing, choosing the right spot to catch your first wave is crucial. In this ultimate guide, we’ll explore some of the best beginner surf spots in the USA, Intro to Surf It’s tricky learning how to surf. It’s one of the most challenging sports to master, and if you’ve already begun your surfing journey, you’ll know this firsthand. But even the best surfers never truly master the ocean and always try to improve their surfing or challenge themselves in new waves. It’s a never-ending process. While that may sound intimidating if you’re just starting, don’t stress. You have to take it one step at a time. But rather than grabbing any old board and heading out to the next beach you see, there are some important factors you need to consider first. One of the most important things is the location, as learning to surf requires specific conditions. When those variables come together can create an awesome, safe, and enjoyable first surf experience. So no, your first surf session doesn’t have to involve tumbling around in the whitewater and dragging a huge foamy behind you by the leg rope. Your first surf should be safe and fun and make you want to come back for more; after all, you want to become addicted like me, right? Before we dive into the best beginner surf destinations in the USA, let’s discover why choosing the right spot is crucial and the most important factors you must consider when choosing a spot. We have a ton to get through, so let’s dive right in. Why is Choosing The Right Spot Important for Beginners? Learning & Progression Nothing puts a beginner off more than bad conditions. 99% of the time, it leads to a horrible first experience and can put some people off for life. Conditions make the difference between spending your first surf lesson mostly underwater and frustrated or having the time of your life! As you progress, the right conditions are crucial in allowing you to practice specific things, for example, going from riding the whitewater to surfing the unbroken wave. You’ll need the right waves to do this. Safe Environment Surfing can be dangerous. After all, you’re in the ocean, which is unpredictable and infinitely more powerful than even the best surfers. All of which are humbled by it at some stage. As a beginner, you want calm, clean waves breaking over sand–conditions that make surfing as easy as possible. Enjoyment The right spot/conditions are make or break for beginner surf enjoyment. If you’re surfing a powerful reef break with huge waves, you’ll probably hate it and want to quit surfing forever. Whereas if you head to a lovely beach break with small waves, you’ll have a great time. So what should you consider when choosing a spot? Key Factors to Consider When Choosing A Beginner Surf Spot Wave Type In Surfing, there are several types of waves, well actually, there are countless, but most of them fit into four categories: Beachbreak – Waves breaking over sand Reef break – Waves breaking over coral or rock reef Rivermouth – Waves breaking into or across the mouth of a river Pointbreak – Waves breaking down the edge of a headland or outcrop of land While some of the world’s best surf spots are reef and pointbreaks, due to the predictability of how they break, as a beginner, aim for a beach break as sand is much softer than the reef (duh), and the waves are generally more forgiving. Wave Height As a beginner, the smaller the waves, the better. You want waves with enough power to push you along in the whitewater but with minimal consequence if you fall. It also makes walking/paddling and handling your board significantly easier as less water moves around. Wave Consistency/Swell Exposure There are beginner and advanced surf spots in surfing, and one of the most notable factors that separate the two is the exposure to swell. The more exposed a break is to swell (meaning it faces directly toward the prominent swell direction), the less suitable it is for beginners, as the waves are bigger and more powerful more often. Instead, you want a sheltered break, less exposed to swell. Crowds At some spots, crowds play a major role in your surf experience. The more people in the lineup (the area where surfers position themselves to catch waves), the fewer waves there are for you. And, of course, you want to maximize your wave count and the time spent on your feet. Local Surf Culture Having a friendly vibe in and around the water is essential when learning to surf. Despite their laid-back reputation, surfers are far from it in some spots! Local surfers can be hostile and even aggressive toward novice riders at some locations. Thankfully, the best beginner surf spots in the USA don’t have this issue. Accessibility & Facilities You need great facilities around you to make surfing easy and enjoyable. Rocking up to an empty windswept beach on your lonesome to surf isn’t that appealing. Instead, you want to choose a beach with a car park, easy access, surf school, showers, changing rooms, and a cafe for a cuppa, never goes a miss. These small things combine to make that first surf experience all the better. Best Beginner Surf Spots in the USA While there are hundreds of places to learn surfing in the States, we’ve narrowed things down to only the best. Spots with infrastructure and combine conditions and accessibility to make your first surf experience as best as possible. From Florida to California and Hawaii, here are the best beginner surf spots in the USA. Best Beginner Spots in California Malibu A wave … Read more

How to Boogie Board for Beginners

man learn how to boogie board deep in a big blue wave

If you are looking for a fun and straightforward way to spend time at the beach with family and friends, boogie board is a tremendous outdoor physical activity. And the best part about boogie boarding is that it is suitable for everyone of all ages. As a beginner, you can learn how to ride a boogie board with the right guide. Boogie boarding is an easier alternative to surfing that still gives you the exhilarating experience of catching waves. In this article, you will learn all you need to know about how to use a boogie board. What Is Boogie Boarding? Boogie board is a water sport where you ride the wave with your stomach lying down on a hydrodynamic board. It can be a recreational activity or a professional sport you partake in. The history of the bodyboard is not entirely clear. But according to some theories, it is an activity that started as a form of surfing centuries ago by the indigenous Polynesians, where they rode wooden boards on their bellies. In the 1970s, Tom Morey modernized the bodyboard with the legendary boogie board, which he made with polyethylene foam. So, what is the difference between boogie board and bodyboard ? Used interchangeably, boogie board and bodyboard refer to the same activity. Today, you can get several types of boogie boards, including electric bodyboards like the Kymera Bodyboard, Wave Jam 156 Jet Bodyboard, and so on, allowing you to surf without waves. Step-By-Step Guide on How to Ride a Boogie Board There are several water activities you can take part in whenever you visit the beach, like surfing and boogie bodyboarding. But is boogie boarding easier than surfing? Boogie boarding is easier than surfing, as it is requires less technical skill, less balance, and is less physically demanding. As such, it is an ideal activity for everyone. If it’s your first time trying to get rid of a boogie board, these boogie board tips below will guide you on how to catch your first wave. Step 1: Choose the Right Size Boogie Board When you want to go boogie boarding, one of the first decisions is choosing the right board size, as understanding the science of bodyboards will help when selecting a boogie board. One way to tell a board is right for you is to stand it up on its tail. If your belly button and the top of the board are the same height, it’s the correct size. Also, it would help if you took note of the choice of materials, such as core, slick, or stringer, and the board’s weight. It is also possible to get top quality and easy to transport inflatable boogie boards. Step 2: Prepare for Boogie Boarding After choosing the right board, preparing it before going to the water is vital. Waxing the board is critical as it helps improve its grip. Since wax is not water soluble, it stays on your board even in water. So, apply a small amount of wax to the nose or top third of the board, the tail or bottom third, and the rails or side edges of the board. You should also wear proper gear, such as a rashguard, wetsuits, and swim fins, and secure the boogie board leash to your wrist or arm. Step 3: Find a Suitable Beach Now that you have the right board and gears, the next thing is to find a suitable beach. As a beginner, not every beach is fit to ride for you. Preferably, aim for a beach with a lifeguard less than 2 feet high. Also, ensure that there are no fishing lines or boats in the area, as well as rocks or fast-moving boats, Step 4: Get Into a Position At this point, you can get into the water. But ensure you stay within the beach. Think of it more like testing the water. Stand at the shallow end of the water and observe how the waves behave. Remember, you are not after the big waves as a beginner. So, as the small waves wash to shore, position yourself so that you can easily lie on the board and paddle to catch waves as they flow back. Step 5: Climb the Board As the wave flows back, climb your board with your belly on it. Ensure the board’s nose is pointed towards the beach as you lie on it. Also, keep your head up so you can see where you are going and be able to breathe too. Arch your legs backward as you try to catch the wave. Step 6: Paddle to the Wave The next question on your mind now is, how do you catch waves on a boogie board? As you climb the board, when you see a wave about to break, you must paddle fast to catch it. Place the fits on your legs underwater and paddle as though you are swimming. Also, paddle with one hand or both hands. Step 7: Maintain Balance As you approach the wave, turn your board around so that you are not facing the beach. The nose of the board, you face the beach so you can ride the wave. Note that this is the most challenging part of riding a wave. You can easily tip over and fall into the water if you don’t maintain your balance. Arching your back and keeping your head up before wave riding increases your chances of maintaining your balance. Step 8: Ride the Incoming Wave As you ride the incoming wave, you can try different maneuvering tricks. For example, you can do a cutback where you speed down the wave and then turn around to catch it again before it breaks. Or you can do a down-knee trick by kneeling with one leg and the other leg positioned at the front of the board. Remember, it’s essential to be in total control over the speed and direction of your ride as a boogie boarder. Conclusion Overall, if … Read more

Best Foam Surfboards | Reviews (South Bay Board)

best foam surfboards

“Foam is your friend. Don’t be scared of it. A little bit of extra foam here and there is good for the soul, and your surfing.” – Rob Machado While he didn’t entirely mean it to be about foam surfboards, his thoughts still resound to how foam surfboards add more fun to surfing. Foam surfboards used to be ugly and uncool until a group of popular surfers used them. Everything changed then. They were once lame and boring. The I-wouldn’t-be-caught-dead-with-that kind of surfboard. But now they’ve become synonymous with cool, fun, and good vibes. Now, almost every surfer has in their rack at least one of the best foam surfboards. Whether you’re a seasoned pro or just dipping your toes into the surf, having the right board can make all the difference. In this guide, we’ll dive into the features, benefits, and user experiences of the best foam surfboards, helping you make an informed decision for your next aquatic adventure. Best Foam Surfboards Foam surfboards have seriously gone a long way in terms of design and ride-ability. You can find and custom for yourself the best size, shape, and fin that will work for you. The perfect surfboard that you can take on small and crummy summer days as well as when shallow barrels are present. For all your foam surfboard scouting needs, we’ve listed down potential boards that may just be the one you’re bringing on your next ride. Verve 8’8 by South Bay Board Co. Wavestorm 8′ Classic Surfboard California Board Company 9’ Foam Surfboard Ruccus 7’ by South Bay Board Co. Giantex 6’ Foam Surfboard Raystreak 7’2” Crocodile Groove Foam Surfboard Easy Rider 7′ by Wave Bandit Empire Ehukai Soft Surfboard #1. Verve 8’ by South Bay Board Co. – Best Foam Surf Board for Beginners, Kids, and Adults   Verve 8 at a Glance Length: 8 feet Width: 23 inches Weight Capacity: 230 pounds Board Weight: 15 pounds Verve 8’ is a high-performance foam surfboard that has the ideal shape and size for catching whitewater waves. Its dimensions running at 8 feet x 23 inches x 3 inches combined with its rounded rubber tail equals superior stability when you are just starting to learn how to turn. The double concave bottom aids in shock absorption and adds up to balance. By far the most impressive of the South Bay Board Co.’s Verve series, it features IXPE (Irradiated Cross-linked Polyethylene) Fingerprint surfaced foam that lets you surf wax free. This keeps you from cleaning off and re-applying wax every single time. The core of Verve 8’ is made of compacted close-cell EPS. This technology aims to prevent water from being absorbed even when the board gets dinged. Some foam surfboards absorb water over time, resulting in it becoming heavier and less efficient rides. It is far from happening with The Verve. The surfboard blank is supported by two full-length wooden stringers and a 2/3 fiberglass center stringer. These are combined with the diamond weave HDPE bottom deck for added firmness, stiffness, and toughness. Every South Bay Board Co.’s board is custom molded to be long-lasting and lightweight. Its nose is balanced to prevent diving and is suitable for riders up to 230 pounds. Verve’s shape that is similar to mini-log with a tri-fin set up, tampered rails and entry-level rocket add up to the maneuverable riding experience better than their competitors. The package includes a GoPro mount, fins, and leash. And, if you throw in a few more dollars, you can go with the full package upgrade that supplies you with a board bag, traction pad, and colorful surfboard paint pens. #2. Wavestorm 8′ Classic Surfboard – Best Foam Longboard Wavestorm 8′ at a Glance Length: 8 feet Width: 22 inches Weight Capacity: Up to 200 pounds Board Weight: 11.5 pounds Wavestorm 8′ is one of the most omnipresent foam surfboards. It wouldn’t be called a “suburban stick” for nothing. After all, this foam surfboard has been everywhere and, in any condition, you can imagine. From the scenes in Jaws to the summer beaches in different surfing spots around the world, Wavestorm’s name paves the way for itself. Beginners and advanced riders will find the size of the Wavestorm ideal. The Rasta Burst color pattern over the 8 feet x 22 ½ inches x 3 ¼ inches sized foam surfboard lets you spot the board even at the farthest part of the shore. It is so lightweight that it is easy to handle as well as to learn how to surf. Wavestorm Company went through extensive and far-reaching manufacturing practices that sought to improve the boards they come out with year after year. Their construction for Wavestorm 8’ is made up of a solid EPS core supported by three stringer system. The crosslink skin top deck and rails offer a more stable, flexible, and comfortable soft top experience. The slick bottom skin made from High-Density Polyethylene (HDPE) makes it a high-impact bottom. Along with its stringer system, this foam surfboard is built to take beating all while being lightweight and buoyant. The three fins come unattached from the surfboard, and you can fix it with the screw-like fin inserts. There are two inserts per each fin and within each fin are a couple of holes that match internally through the threading. This essential accessory lets you cut through the water to give you traction. Without it, you could potentially slide and spin out of control. Wavestorm 8′ is perfect for anyone who is learning how to surf. They are easy to stand up on and the chances of falling, getting frustrated, and disliking getting back in the ocean reduce. Its construction contributes to the minimal odds of getting injured while surfing. Overall, it is safe, easy, affordable, and ideal for beginners. #3. California Board Company 9’ Foam Surfboard – Best for Heavier Riders California Board Company 9’ Foam Surfboard at a Glance Length: 7 Feet (comes in other sizes too) Width: 22 Inches Weight Capacity: 210 … Read more

Top 7 Best Wakeboards for Beginners

best wakeboards for beginners

Wakeboarding is genuinely a fun-filled sport that can give you an exhilarating adrenaline rush. We understand that, at this point, there is scarce data about the best wakeboards for entry-level wakeboard riders online. Thus, we conducted our research and gathered the products we believe are the optimal choices for beginner wakeboard riders. Remember that buying a high-quality wakeboard for beginners is really important. This piece of water sports equipment will ensure that you get maximum safety in the water. Also, premium-quality wakeboards for beginners let you enhance your skills, serving as the ideal equipment that you can progress with your wakeboarding lessons. The following seven wakeboards are the highly rated ones in the market today: Top 7 Best Wakeboards for Beginners Reviewed Airhead Radical Wakeboard Liquid Force Trip Wakeboard CTRL Imperial Men’s Wakeboard Slingshot Choice Wakeboard Ronix Vault Boat Board O’Brien System Wakeboard with Clutch Bindings Hyperlite Dipstick Wakeboard 1. Airhead Radical Wakeboard Specifications: Size Available: 143 centimeters Rider Weight: 150 pounds and above Height: 12 inches Color: Multicolored Riding Style: All levels Rocker: Continuous Core Material: Reaction injection molding (RIM)-molded polyurethane (PU)-core Other Features: 2 removable fiberglass-reinforced nylon fins, Beveled perimeter, Large binding sizes, Rounded end profile If you are looking for a fantastic transitional piece of wakeboarding equipment from novice to professional levels, the Airhead Radical Wakeboard highly suits you. This visually appealing wakeboard lives up to all riders’ standards, delivering a bit more pop. The Airhead Radical Wakeboard is 143 centimeters in size, and its manufacturer designed it to assist wakeboard riders of all levels to be the best they can be in the sport. Also, this wakeboard lets you attain excellent tracking through its two pieces of removable fiberglass-reinforced nylon fins. Off the wake, the Airhead Radical Wakeboard allows you to relish consistent and forgiving release through its beveled perimeter and rounded end profile. Furthermore, the Airhead Radical Wakeboard comprises bindings that will transform you into the “king of wakeboarding.” These features are more form-fitting and stiffer than the standard series. The Airhead Radical Wakeboard’s bindings give superior support, as well as a tight and cozy fit. These advantages are through the five pairs of independent lace eyelets and the lower and upper cinch lace-up system. With the Airhead Radical Wakeboard, you can anticipate unprecedented performance in the water. Its float type is for aiding wakeboard riders in excelling in the water sport, regardless of their ability levels. The Airhead Radical Wakeboard is also gorgeous, thanks to its abstract geometric graphic design. 2. Liquid Force Trip Wakeboard Specifications: Sizes Available: 130 centimeters, 135 centimeters, 139 centimeters, 144 centimeters Rider Weight: 60 to 130 pounds (130), 90 to 170 pounds (135), 140 to 225 pounds (139), 170 to more than 240 pounds (144) Height: 2.4 inches (130); 2.5 inches (135); 2.6 inches (139); 2.7 inches (144) Color: Multicolored Riding Style: Beginner to advanced Rocker: Aggressive continuous Core Material: Fiberglass and polyurethane core Other Features: Double concave V at ends, Variable edge rail, D-I-S-C (Double, Inside, Single, and Concave) Hull with edge channels, Diamond, bat-tail shape, Warped, molded-in side fins, Removable center fin As a beginner, are you seeking wakeboard durability and the best wakeboarding experiences? You should look no further because the Liquid Force Trip Wakeboard offers these two benefits. It is the ideal wakeboard for riders of any ability level. Plus, the Liquid Force Trip Wakeboard has a fuller tip contour, so you get more pop. The Liquid Force Trip Wakeboard offers you greater control with its D-I-S-C hull. D-I-S-C stands for “double” for D, “inside” for I, “single” for S, and “concave” for C. This advantage makes your landings much more predictable. The D-I-S-C hull lets the wakeboard hover on a favorably maintained pace as well. If you hit the beach water, the D-I-S-C hull got your back safeguarded, so you do not need to worry. As you cruise across the beach water, the Liquid Force Trip Wakeboard’s longer, molded-in fins deliver additional stability by keeping the water out. This wakeboard also includes a continuous rocker bottom, so you can break up the landings and perform well in the water. The variable edge rail makes the middle smoother and sharper towards the ends. The Liquid Force Trip Wakeboard can surely help you progress from being a beginner wakeboarder to an advanced one easily. It is forgiving and smooth for new wakeboarders and aggressive and fluid for expert ones. You get into a comfortable position with the Liquid Force Trip Wakeboard as it is a genuine classic in the wakeboarding industry that has stood the test of time. This piece of wakeboarding equipment lets you enjoy a smooth-performing wakeboard at a budget-friendly cost. 3. CTRL Imperial Men’s Wakeboard Specifications: Sizes Available: 136 centimeters and 140 centimeters Rider Weight: 160 pounds and above (136); 180 pounds and above (140) Height: About 2.4 inches Color: Red Riding Style: Beginners Rocker: 3-Stage Core Material: PBT deck (Terephthalate and Polybutylene) Other Features: Removable center fin, V Hull, 6-inch insert pattern, Variable edge design Nexus base Do you want a straightforward way to start your wakeboarding journey? Then, avail of the CTRL Imperial Men’s Wakeboard! This piece of water sports equipment for beginners is a classic piece of wakeboarding equipment. It is high-quality and easy to use. The manufacturer of the CTRL Imperial Men’s Wakeboard is the Cable Technology Research Lab or CTRL for short. The company puts a premium on the production of superior-quality wakeboards. Plus, the CTRL constructed the CTRL Imperial Men’s Wakeboard using Polybutylene terephthalate or PBT material. It includes a step cap rail and a six-inch insert pattern, making this piece of wakeboarding equipment ideal for cable park and boat use. Furthermore, the CTRL Imperial Men’s Wakeboard is durable and features fantastic graphics. It is a beautiful wakeboard that performs well in the water, regardless if it is wet for a long time. As a beginner wakeboard rider, you may find it challenging to remain stable on the water and may need to adjust for quite … Read more

subscribe

"*" indicates required fields

Privacy*